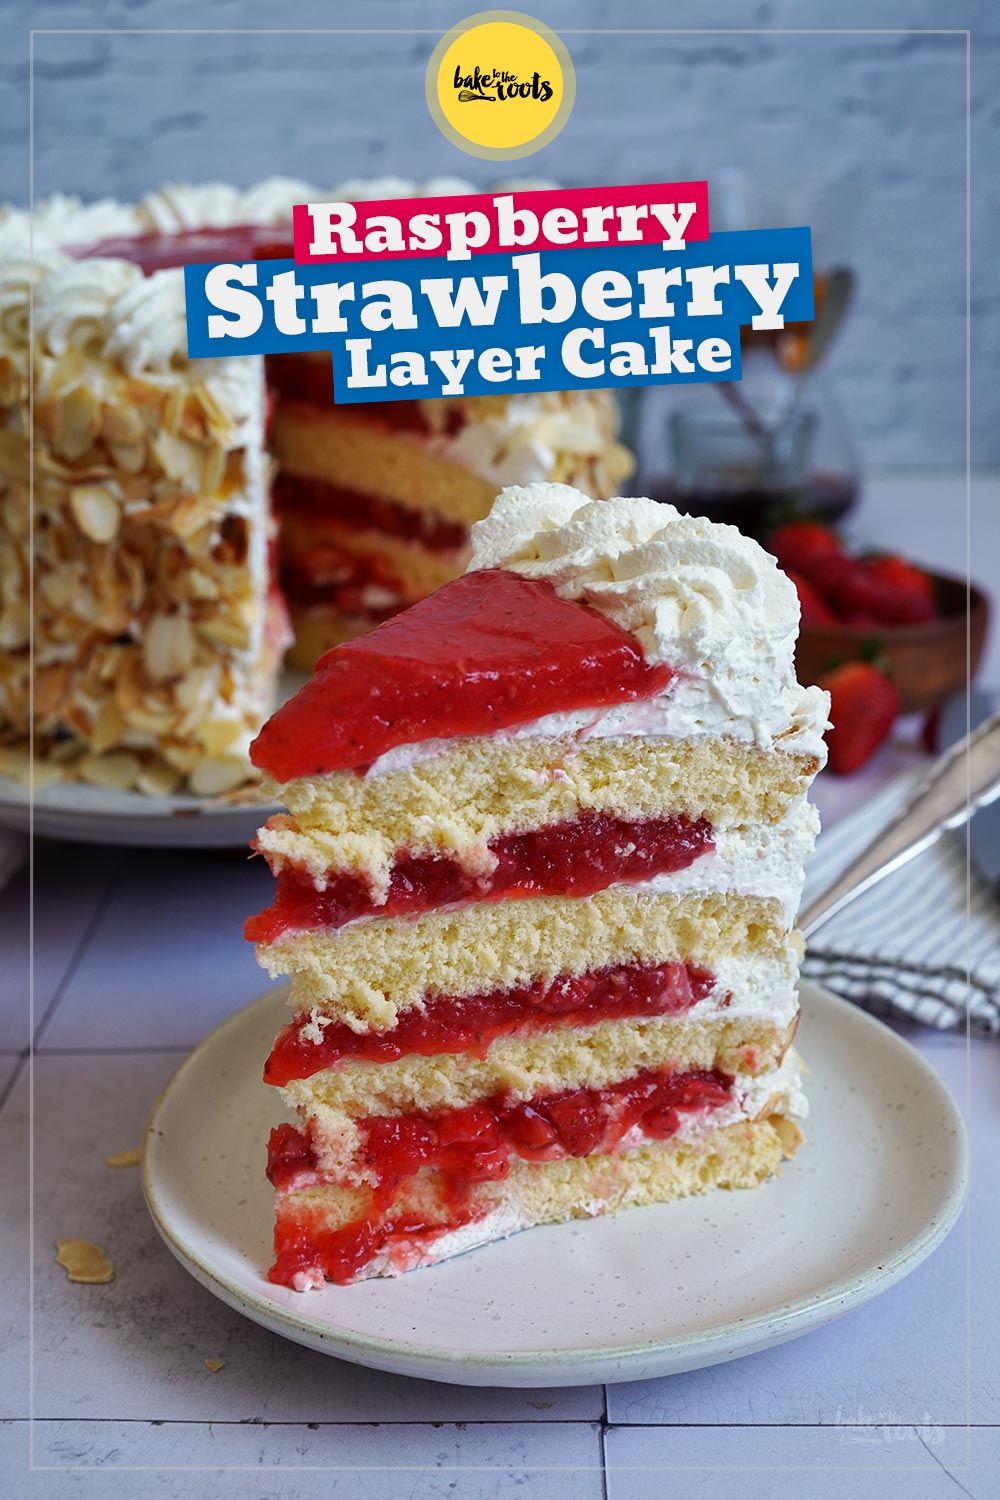
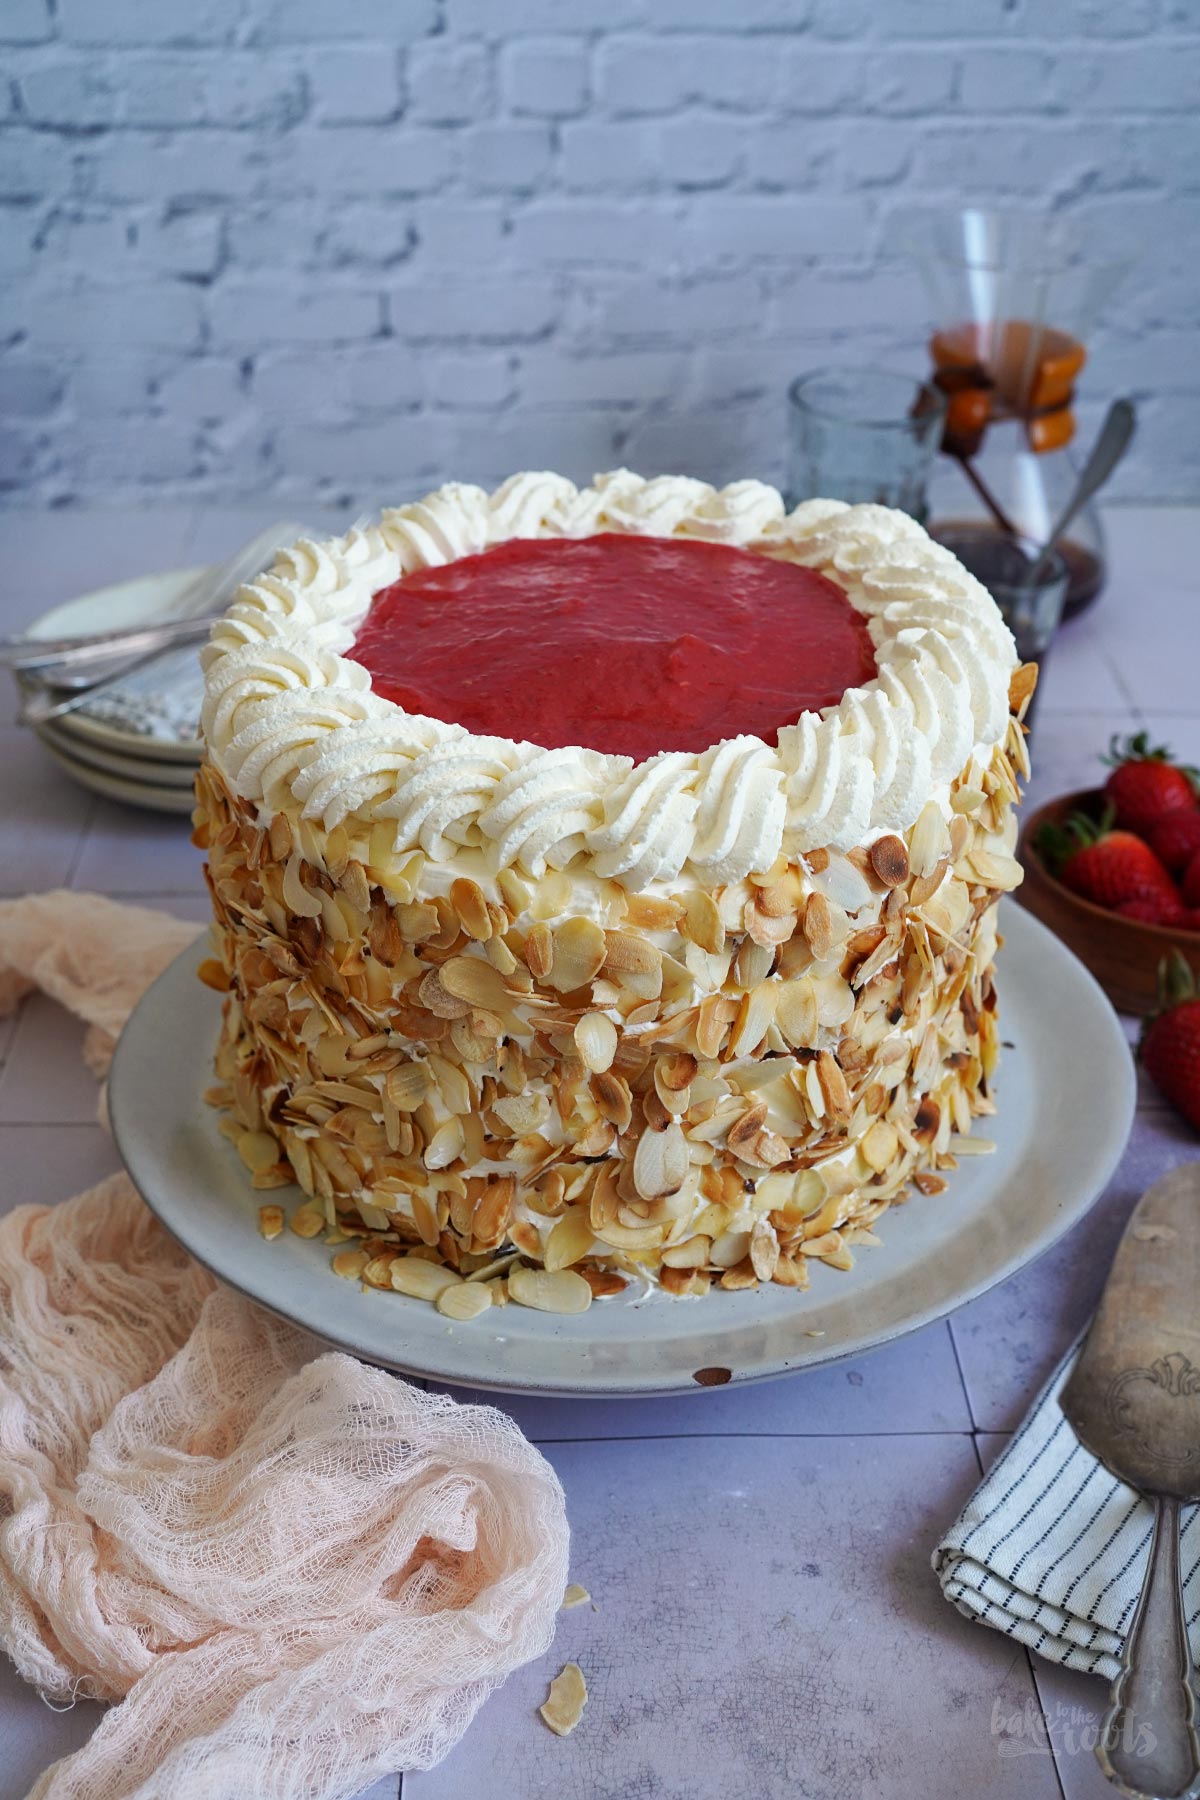
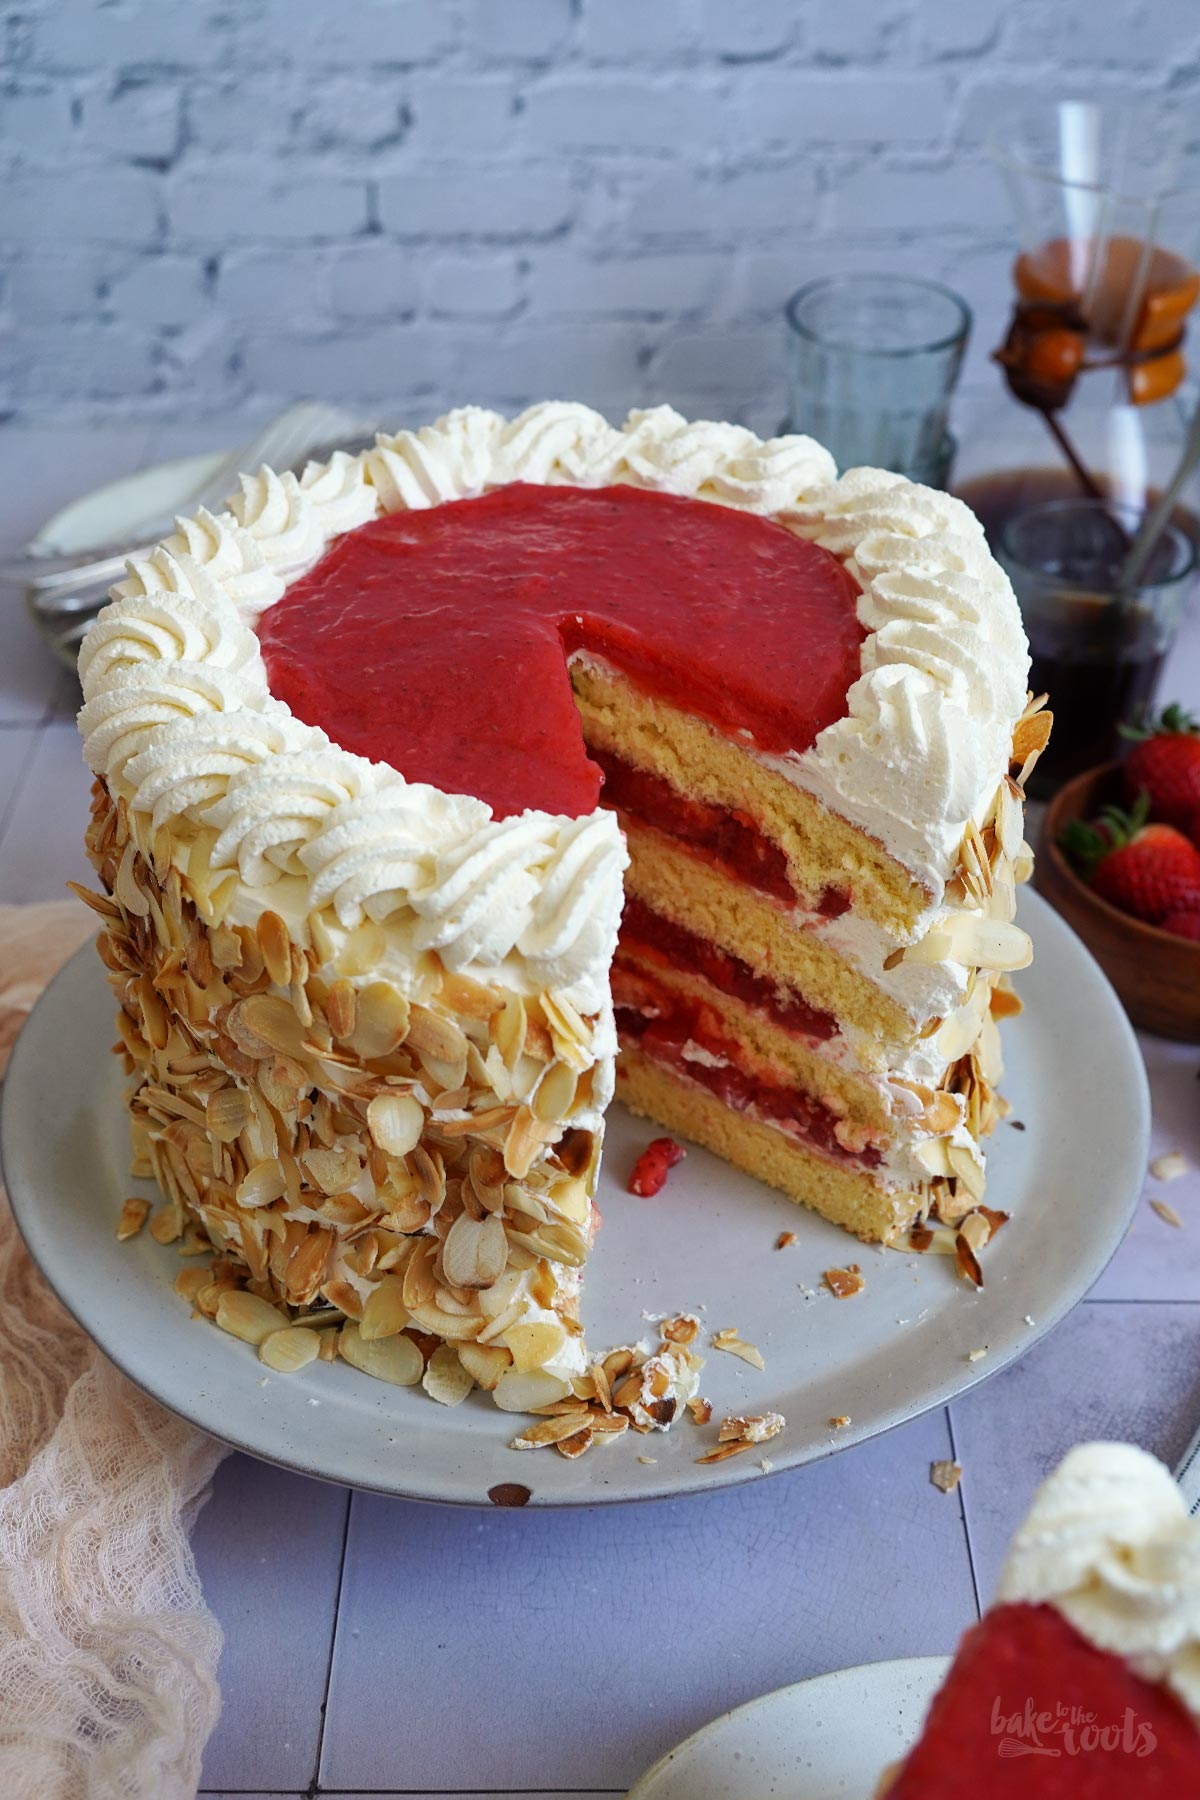
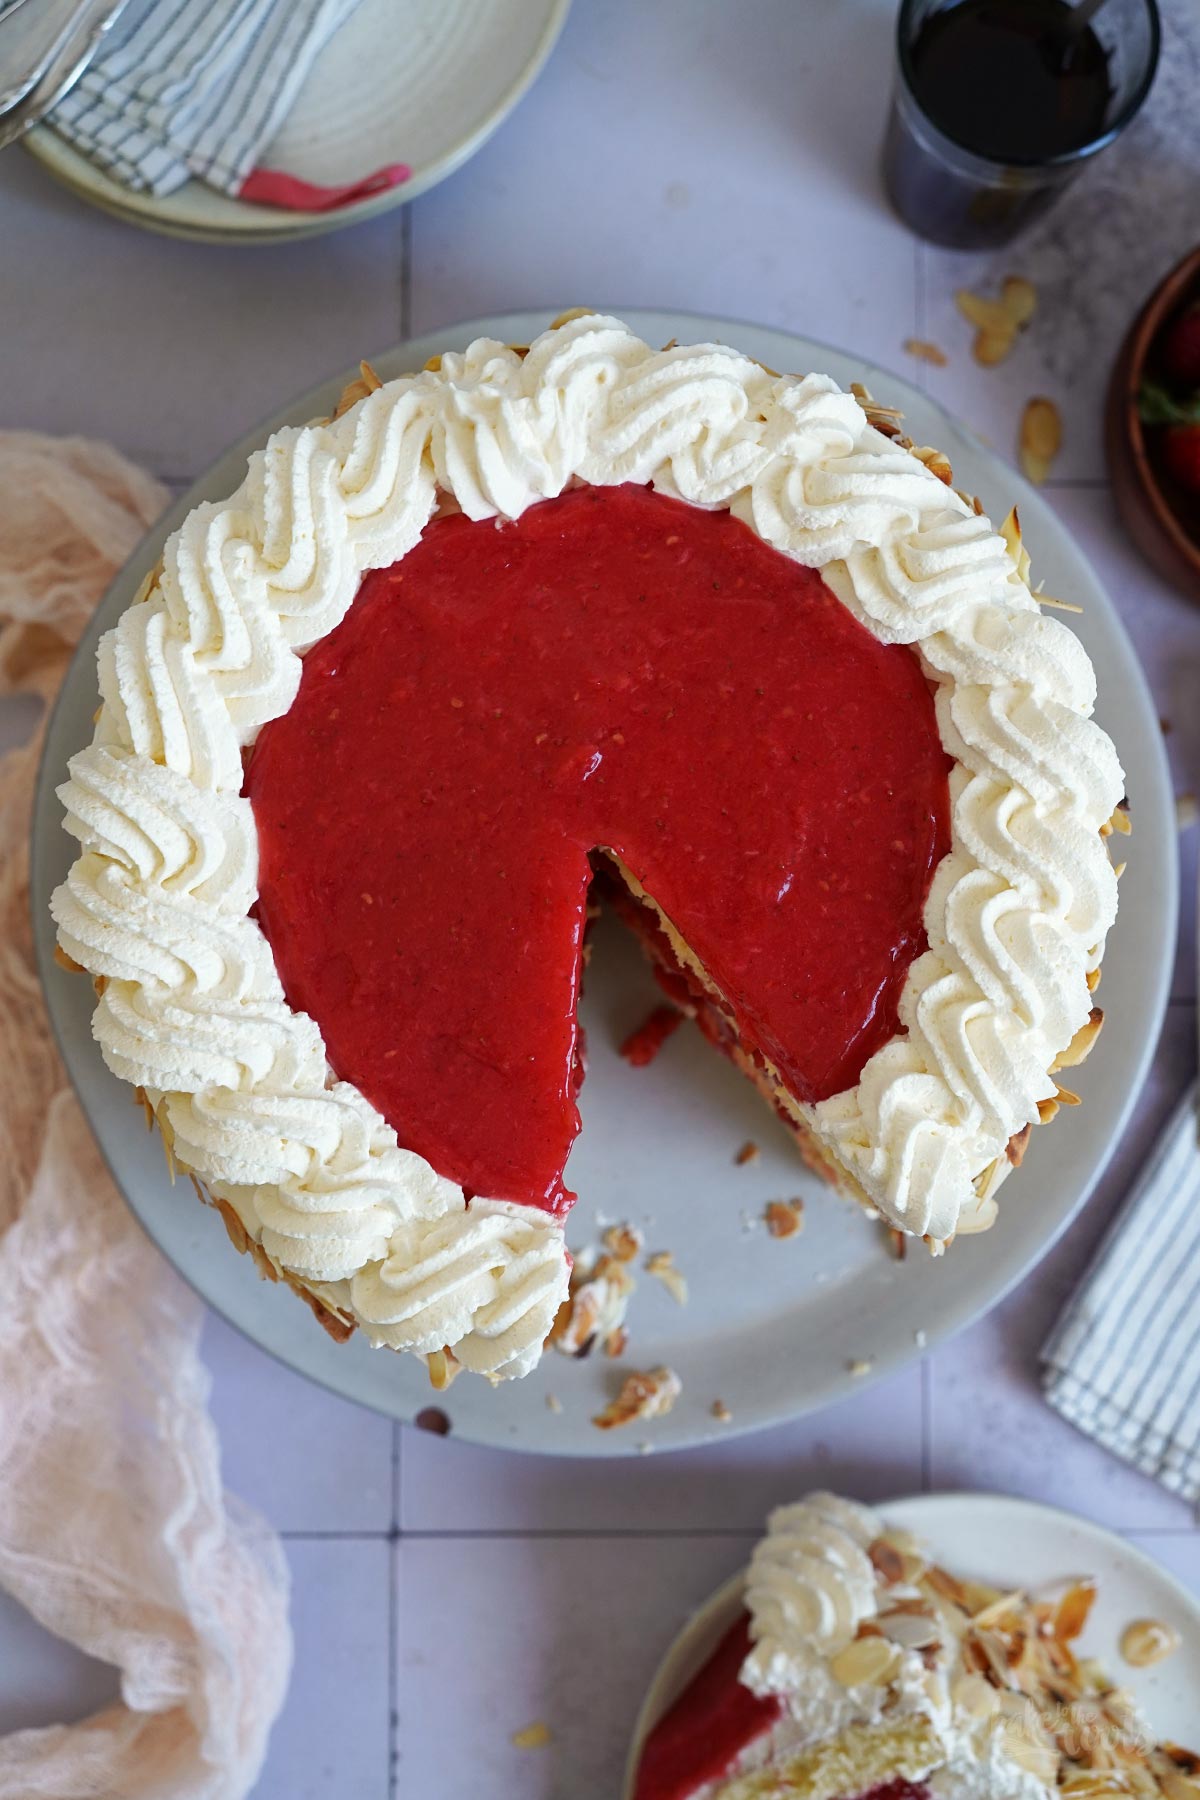
It’s time for a little treat again – or more precisely, a Strawberry & Raspberry Layer Cake for a very special occasion! Today we’re celebrating a small anniversary, and of course, that calls for some nice cake. Since we don’t do things half hartedly (Ha, ha!), this cake is a bit more substantial. After all, it should be enough to feed several people…
Some of you are probably wondering what we’re celebrating. Well, that’s easily explained… or almost easily explained. Ten years ago, a dear blogger friend of mine, Andrea from Zimtkeks & Apfeltarte, and I started baking together once a month based on a theme/topic we agreed on beforehand. We call this monthly event our »Bake Together – The Baking Surprise«.
Why do we do that? Well, we realized at some point that we often posted similar recipes on our blogs and social media accounts around the same time. This gave us the idea to choose a common theme/topic once a month and then see what we both can come up with. Hence, the »Bake Together« and the »Baking Surprise«. Unfortunately, the »baking together« part only happens virtually. We live in different parts of Germany and see each other rather rarely… regrettably.
Well… all of this is explained in our very first posts from ten years ago. Back then, the topic was to make something like a »Strawberry Cheesecake«, and I made a Strawberry Ombre Cheesecake with a Salted Pretzel Base – Andrea opted for a No-Bake Strawberry Cheesecake with an Oreo Base. Similar approach to the topic, but quite different results. This has often been the case over the last ten years – similar ideas, but the bakes often often turned out quite different.
If you were to add it all up – one recipe every month for the past ten years – you’d think we’ve each made 120 recipes. But this little cake with strawberries and raspberries is actually my 140th recipe for our monthly »Bake Together«. In recent years, in addition to our monthly recipes, we’ve also run several other »Bake Together« special events. I’m talking about »Vegan Bake Together« weeks, an Easter special, a Christmas special… We even created some recipe e-books (in German only, sorry) as goodies for those specials…
Anyway. To celebrate the special occasion, we’re having a delicious little cake today. Because that’s the topic for our little anniversary, of course. Not just any simple birthday cake – it had to be a nice, big one today. Even though Andrea and I prefer baking other stuff, for special occasions, a delightful layer cake is a must-have…
Making the layer cake isn’t too complicated. The individual components are easy to prepare, but putting it all together takes a little time, unfortunately. Baking some cake layers here, fixing up a filling and cream there, and then, of course, the assembling and the decorating. In my case, no fondant or anything like that on top. Cakes decorated with fondant may look impressive, but unfortunately, that stuff does not really taste good. I prefer a simple buttercream decoration and stuff like that. Maybe some fresh fruit, colorful sprinkles… there is so much you can do with that.

Anyway. I wish everyone the best of luck baking and assembling their little torte! If you’d like to try more layer cakes like this, you’ll find more recipes here on the blog. Not a huge number, but I do have a few nice cake recipes to offer.
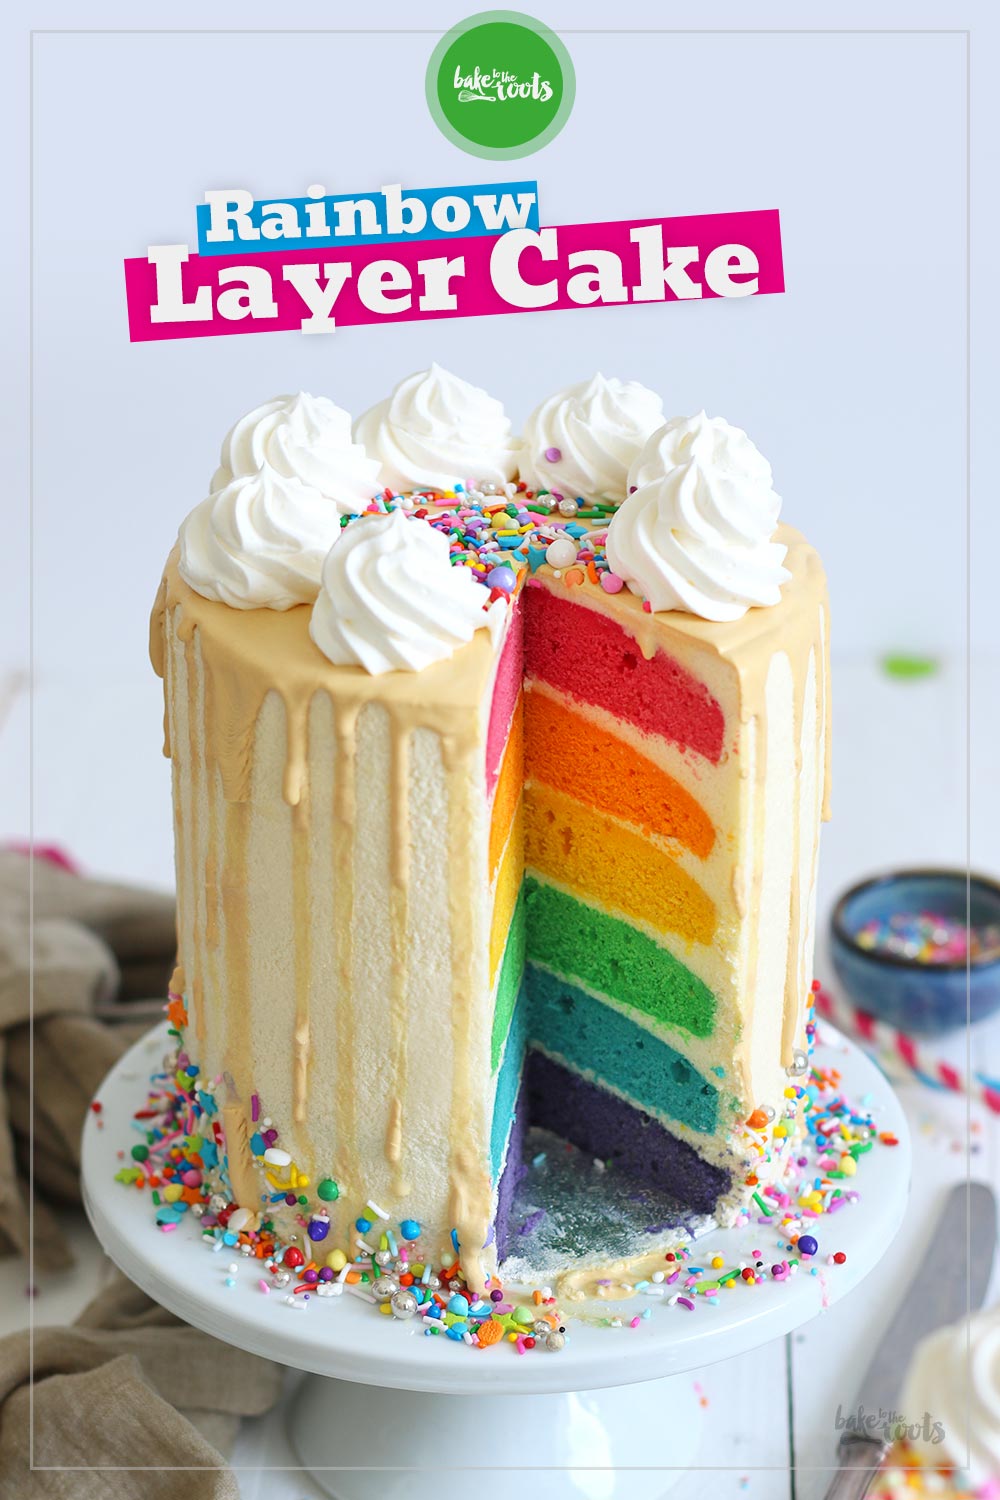
For our previous »Bake Together« anniversaries (the 3rd and 5th), Andrea and I each also baked little layer cakes – you can, of course, try them here as well if you are into those cakes. For example, there’s a delicious Chocolate Cake with Rainbow Decorations or a Rainbow Cake with a delightful colorful inside. Both are a bit more elaborate, but when there’s something to celebrate, you’re happy to spend a little extra time in the kitchen and put something together… Huzzah! ;P

INGREDIENTS / ZUTATEN
For the strawberry & raspberry filling:
1 cup (240ml) water
2.1 oz. (60g) cornstarch*
17.6 oz. (500g) fresh strawberries, diced
3.5 oz. (100g) fresh raspberries
3/4 cup (150g) sugar (fine)*
2 tbsp. lemon juice
1 tsp. vanilla extract*
For the cake batter:
8 medium eggs, divided
1 pinch of salt
1 cup (200g) sugar (fine)*, divided
1 tsp. vanilla extract*
8.1 oz. (230g) all-purpose flour*
1/2 tsp. baking powder
1/4 tsp. salt
For the mascarpone cream:
9 oz. (250g) mascarpone, cold
2 tbsp. confectioners’ sugar*
2 tsp. vanilla extract*
9 oz. (250g) heavy cream or alternative* (see note), cold https://amzn.to/4e9XqV3
For the decoration:
5.3 oz. (150g) sliced almonds, toasted
some fresh strawberries & raspberries (optional)
Für die Erdbeeren & Himbeeren Füllung:
240ml Wasser
60g Speisestärke*
500g frische Erdbeeren, gewürfelt
100g frische Himbeeren
150g Zucker (fein)*
2 EL Zitronensaft
1 TL Vanille Extrakt*
Für den Teig:
8 Eier (M), getrennt
1 Prise Salz
200g Zucker (fein)* , geteilt
1 TL Vanille Extrakt*
230g Mehl (Type 405)*
1/2 TL Backpulver
1/4 TL Salz
Für die Mascarponecreme:
250g Mascarpone, kalt
2 EL Puderzucker*
2 TL Vanille Extrakt*
250g Schlagsahne oder eine Alternative* (s. Hinweis), kalt https://amzn.to/4e9XqV3
Zum Dekorieren:
150g Mandelblättchen, geröstet
einige frische Erdbeeren & Himbeeren (optional)
DIRECTIONS / ZUBEREITUNG
1. Start with the strawberry-raspberry filling. Mix the cornstarch with about half of the water and set aside. Wash and dry the strawberries and raspberries. Remove the green leaves from the raspberries and cut them into small dice. Add half of the diced strawberries and all the raspberries to a large saucepan, as well as the remaining water, sugar, lemon juice, and vanilla extract. Use an immersion blender and mix to get a smooth berry sauce. Next, heat up and bring that mixture to a boil. Let the mix simmer over medium heat for about 2-3 minutes. Next, add the cornstarch mixture and stir it in until the berry mixture starts to thicken. Let the mixture bubble for another 2 minutes so you get a pretty thick berry custard. Remove from the heat and let cool down for a moment, then add the remaining strawberries and mix in. Place a piece of plastic wrap right on top of the berry custard to prevent a skin from forming and let it cool down completely. You can do this step a day ahead of time.
2. Preheat the oven to 170°C (340°F). Grease four 20cm round silicone baking molds* lightly and set them aside.
3. Divide the eggs – add the egg whites with a pinch of salt to the bowl of a kitchen machine and whisk until slightly foamy. Slowly add half of the sugar (100g) while mixing constantly. Once the sugar is added completely, continue mixing on high for another 2 minutes or so until the mixture is thick and glossy.
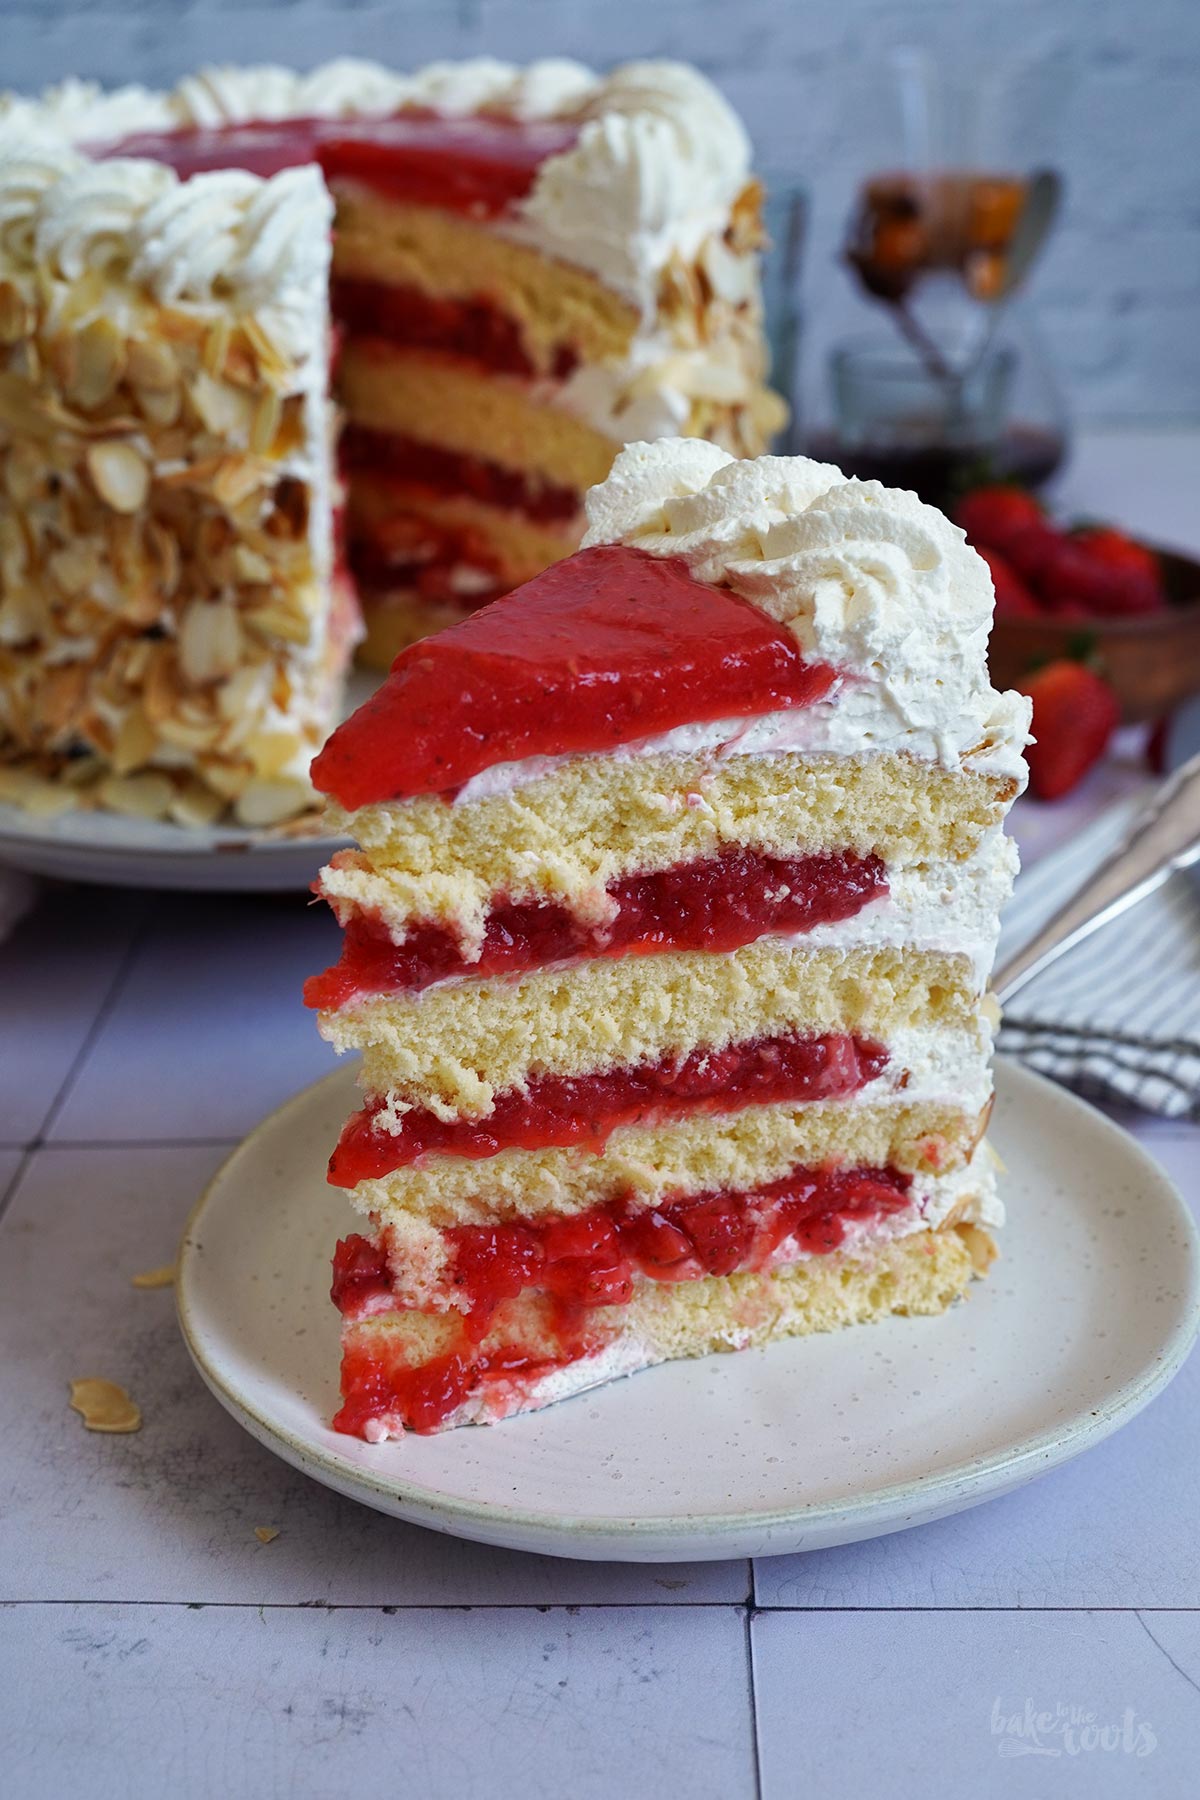
4. In a separate bowl mix the egg yolks with the remaining sugar (100g) and vanilla extract until light and fluffy – takes about 2-3 minutes. Combine flour, baking powder, and salt. Sift it in several batches into the bowl and fold it in with a rubber spatula. Next, add the whisked egg whites in several batches as well and fold in carefully. It’s fine to mix a bit more vigorous at the beginning to loosen up the batter, but most of the whisked egg whites should be folded in carefully to keep as much volume as possible. Divide the batter evenly between the silicone molds and bake the cake layers for 20-23 minutes – switch the positions of the baking molds half way throught the baking time. Take the cake layers out of the oven, flip them in the silicone molds onto wire racks. Remove the molds carefully when everything has cooled down a bit.
5. For the mascarpone cream add the mascarpone, confectioners’ sugar, and vanilla extract to a large bowl and mix until well combined. Add the heavy cream and start mixing slowly, then increase the speed and mix everything until stiff peaks form – this can take 2-3 minutes. Fill the cream into a large piping bag with a star tip and set aside.
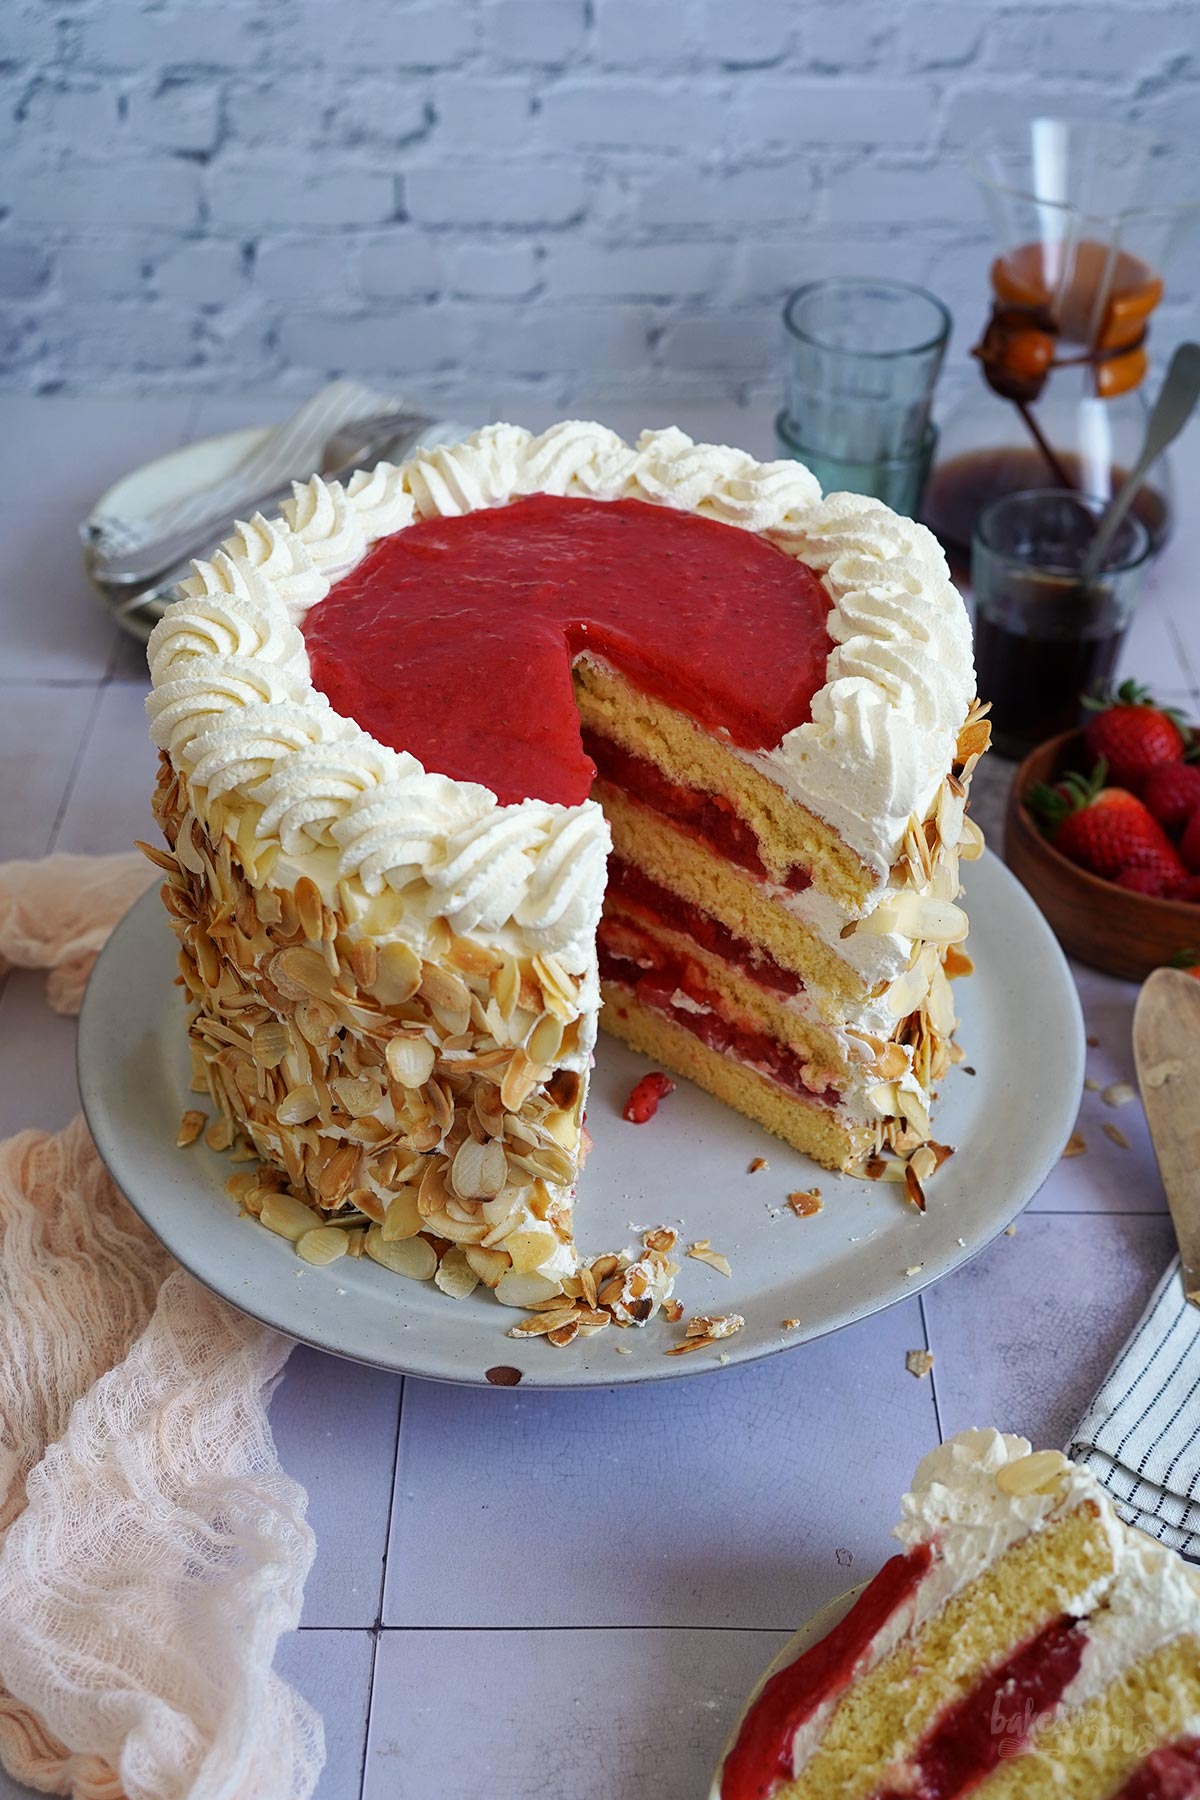
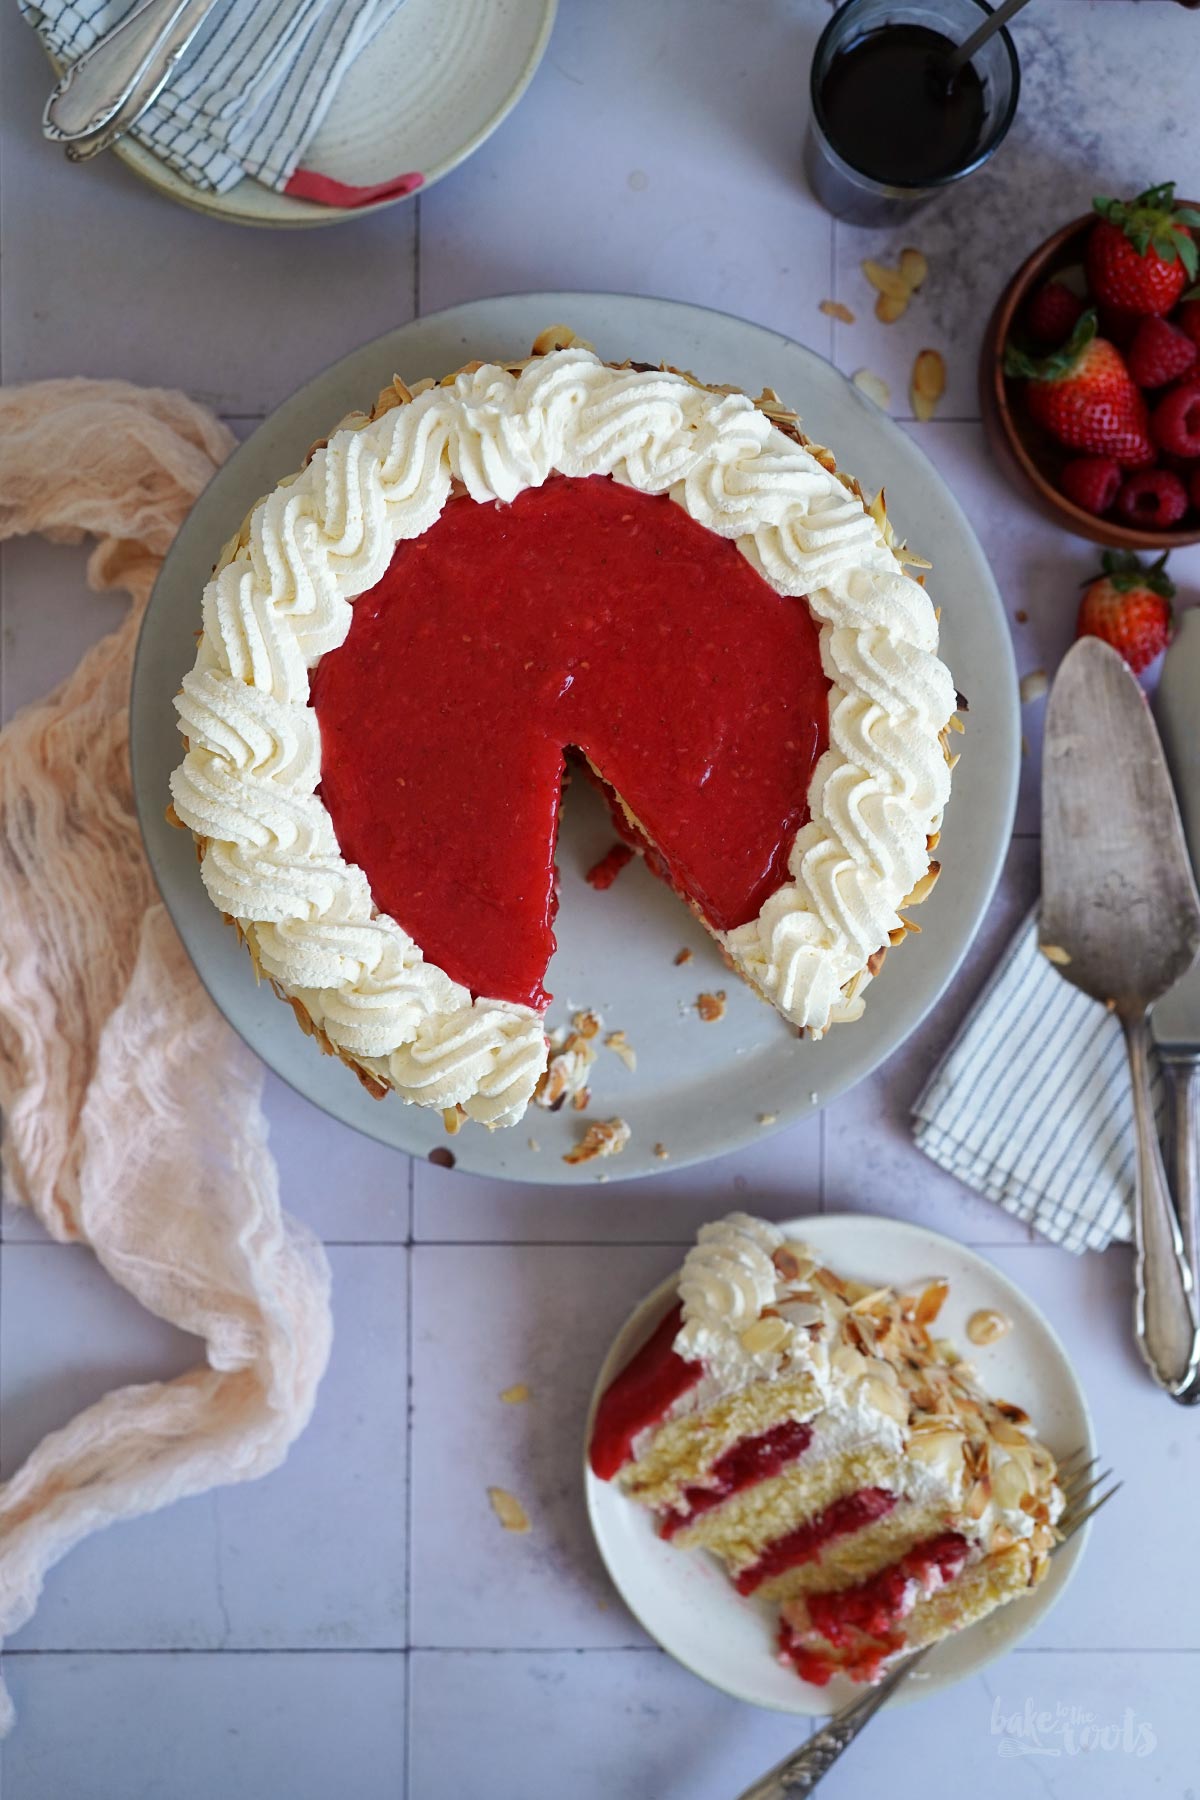
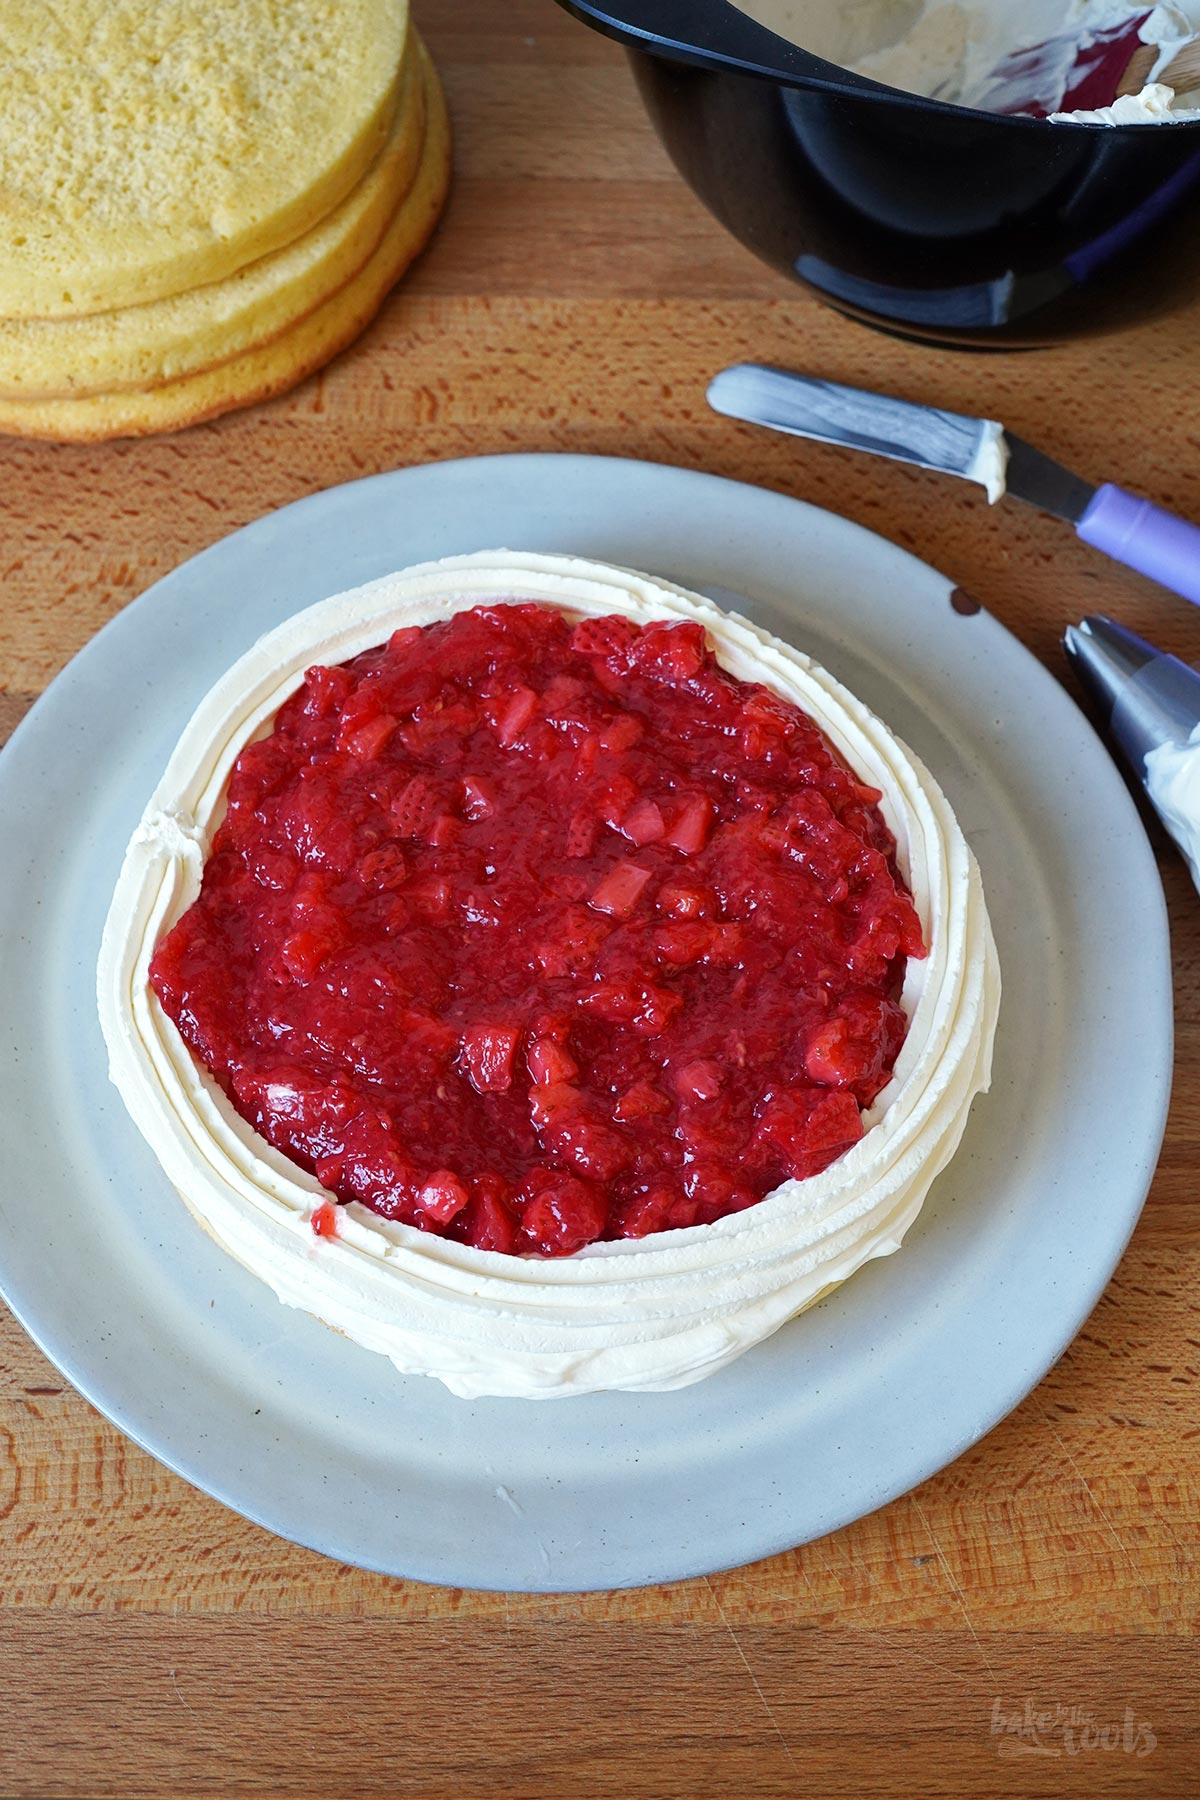
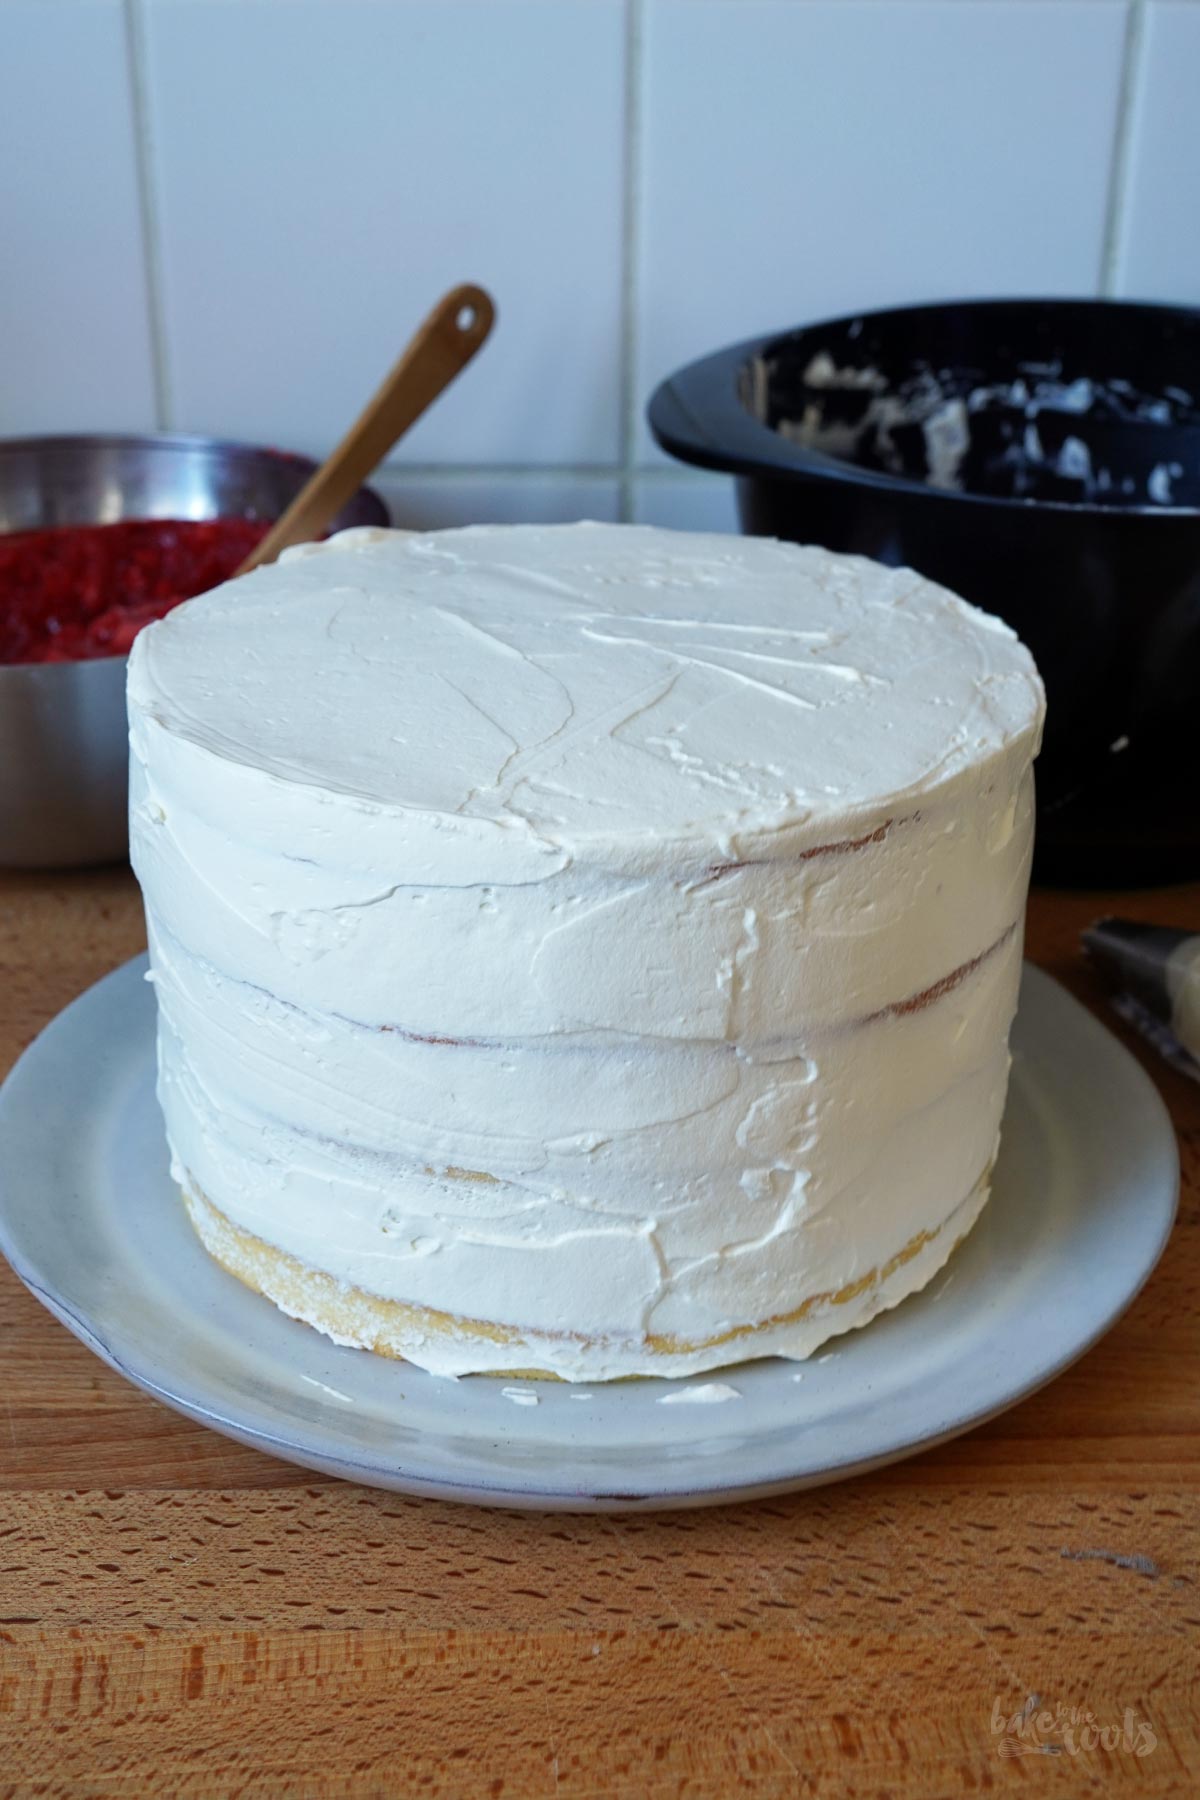
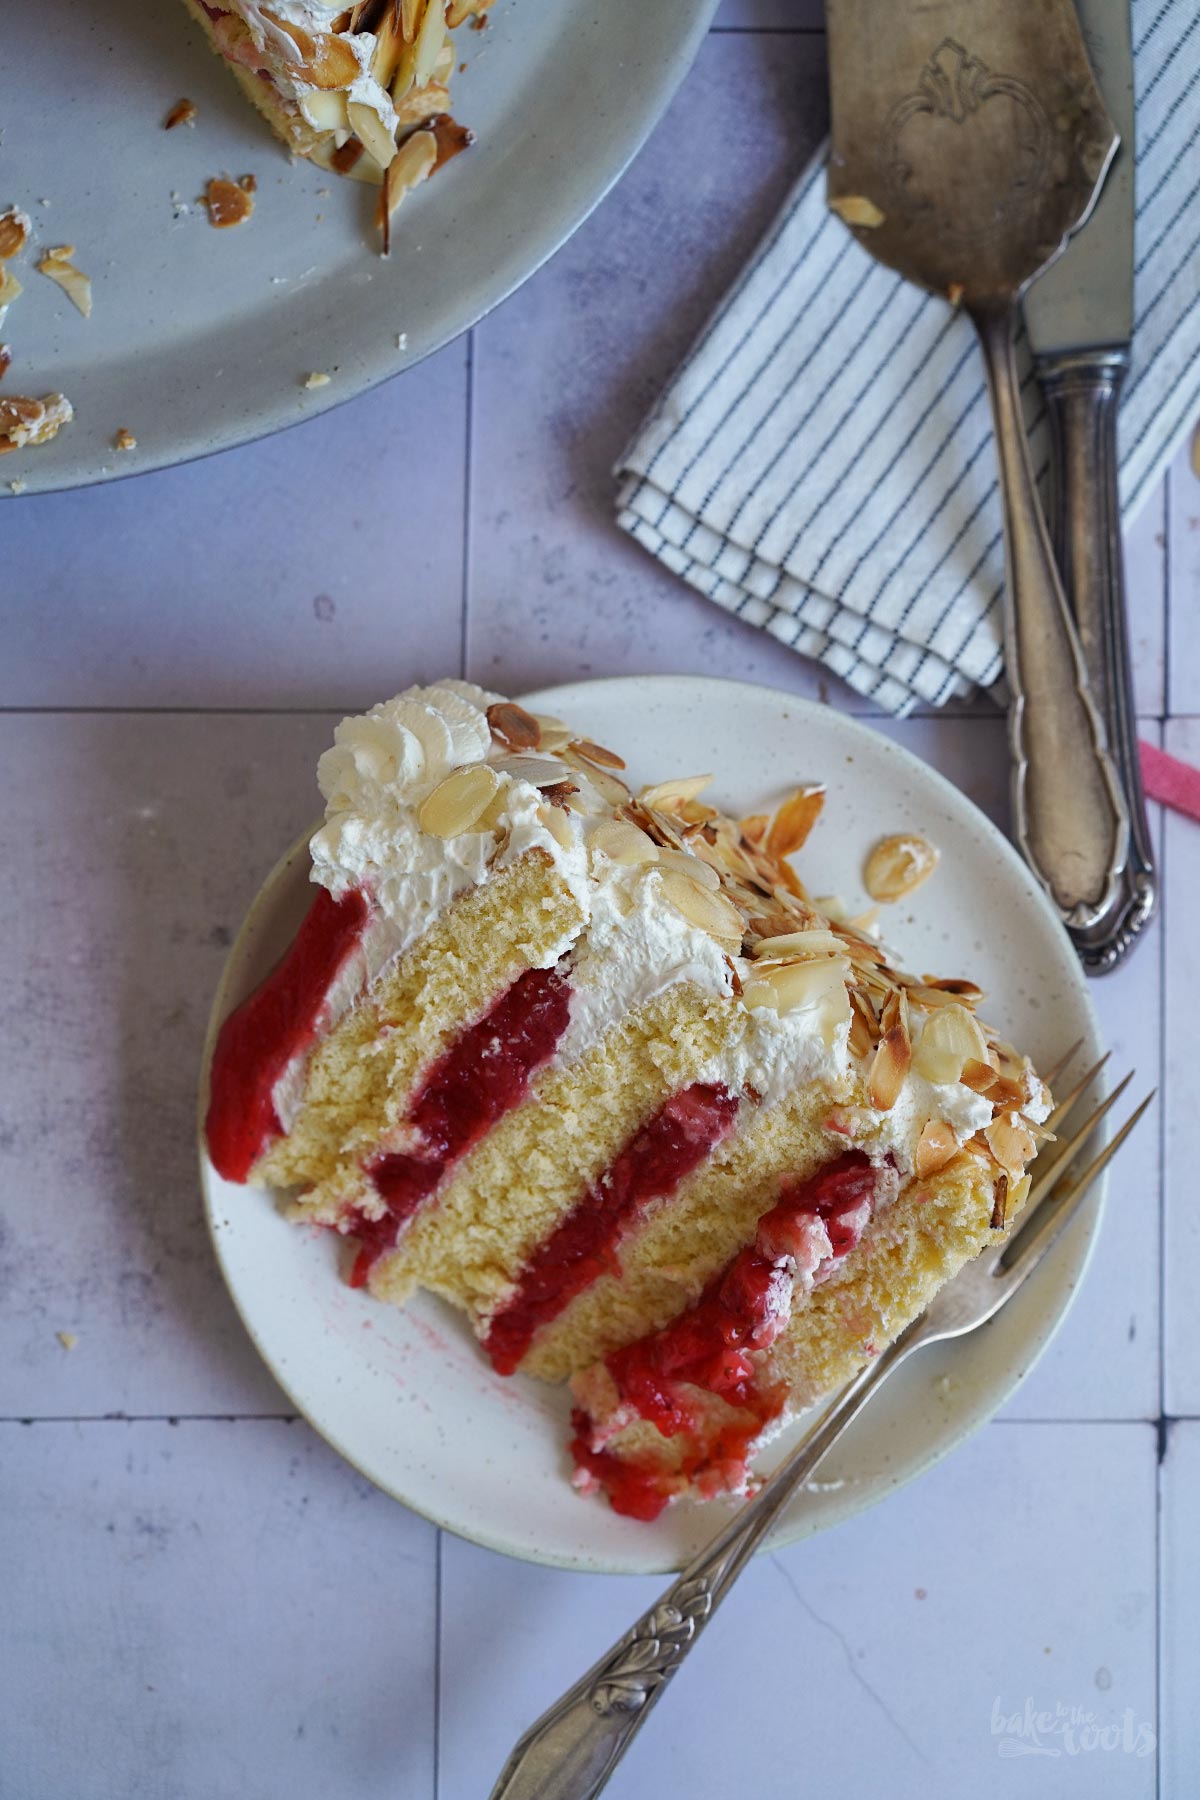
6. To assemble the cake place a cake layer on a serving plate. Pipe a small amount of the mascarpone cream on the cake layer and spread it evenly with an angled cake spatula*, for example. Next, pipe a border with the cream around the edges of the cake. Spoon a good amount of the strawberry-raspberry filling onto the cake and spread it evenly – you want an even layer with the cream border you piped before. Place a cake layer on top and press it down a bit. Repeat the process with cream, filling and the remaining cake layers. When you have added the last cake layer, coat the whole cake with mascarpone cream. You don’t have to work super clean – the cake will be covered with sliced almonds anyway. Keep enough cream to decorate the cake with little swirls.
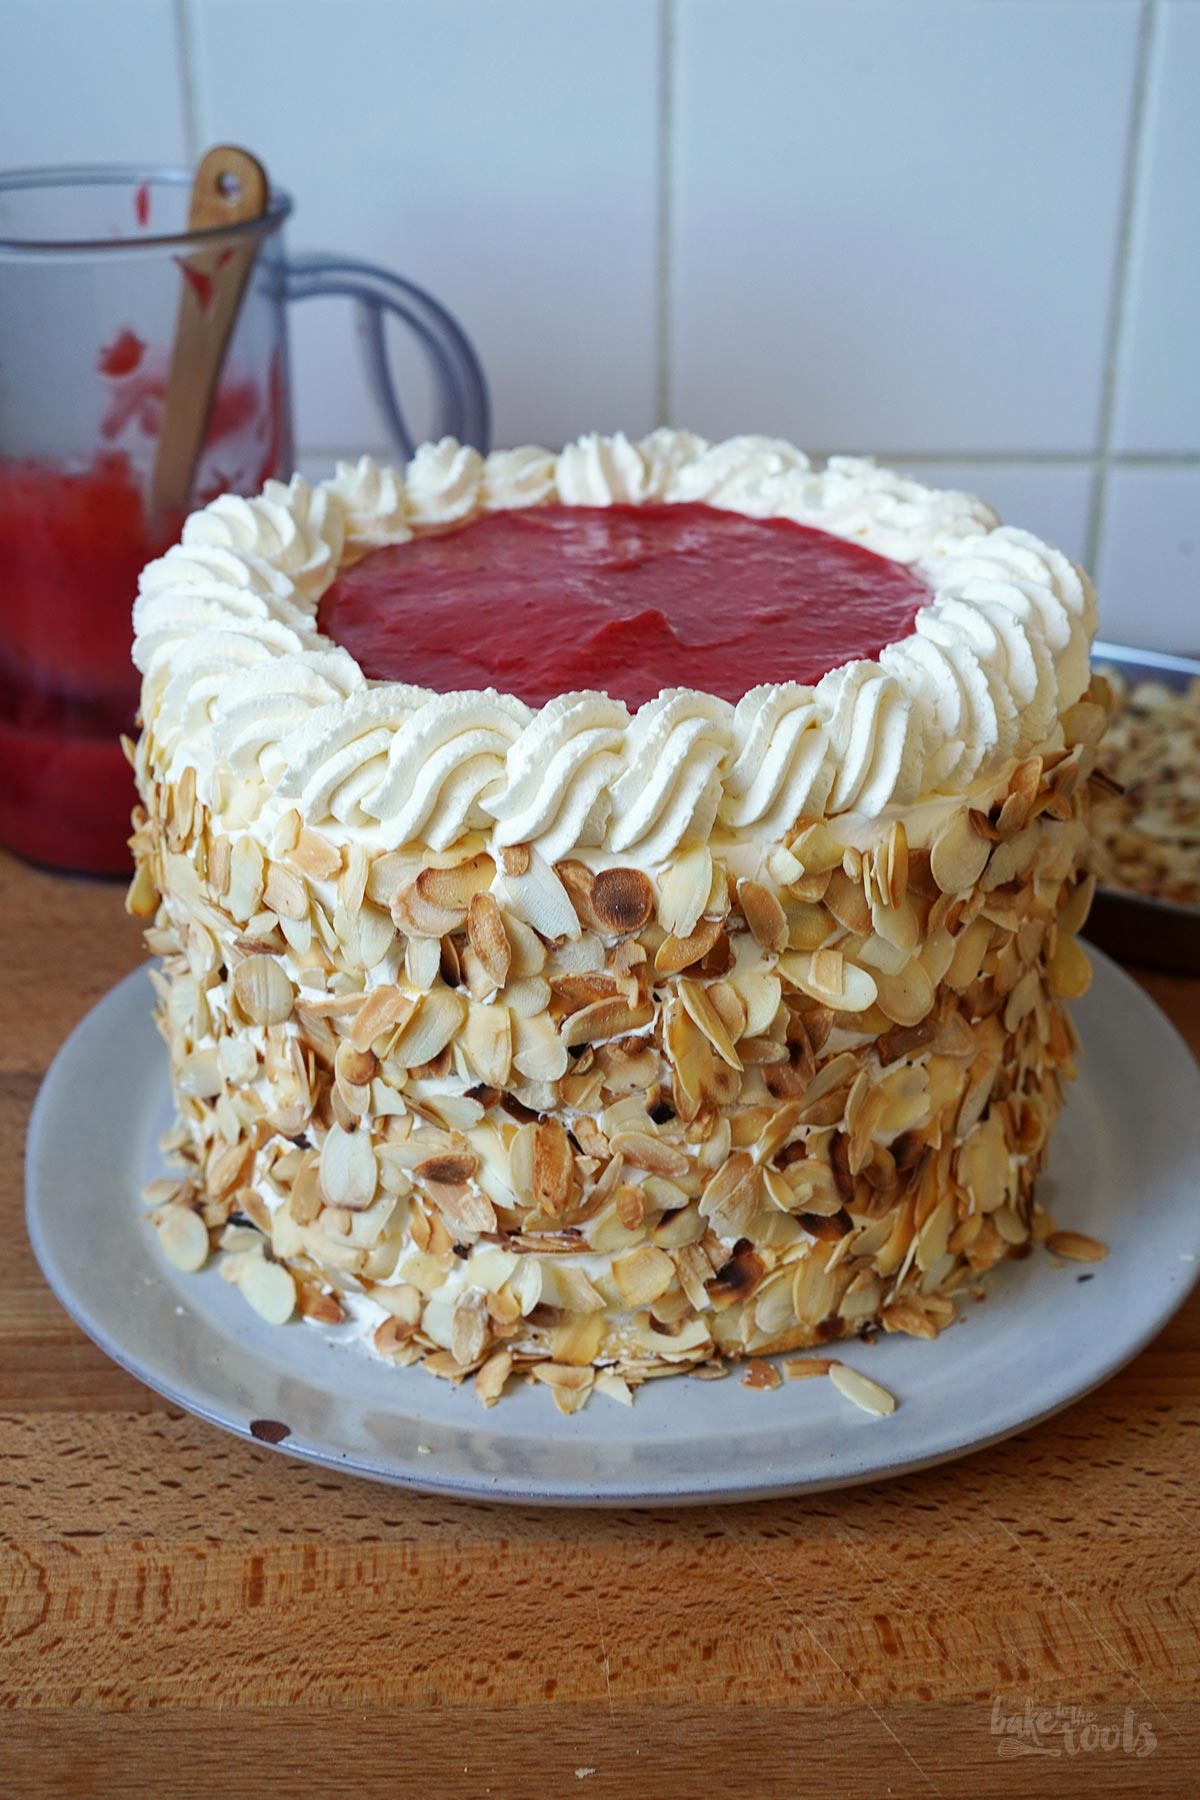
7. Press the toasted sliced almonds onto the cake along the sides. This works best when you hold the cake over a bowl or plate to catch sliced almonds falling down. Decorate the cake with the remaining mascarpone cream and fresh fruit to your liking. Keep the cake in the fridge until ready to serve.
Notes:
+ I prefer using Rama Cremefine (19% Fat)* which is an alternative for heavy cream. It’s more stable than heavy cream and does not split when whipped longer. The whipped cream you can make with that is also whiter than whipped cream made with heavy cream.
+ To get the toasted sliced almonds, simply add them to a large non-stick frying pan and toast them without anything added until lightly browned. Be careful not to burn them.
+ You will not need all the toasted sliced almonds to coat the cake, but having a bit more makes it easier to work with it. Leftovers can be used in other desserts. The same goes for the strawberry filling if you have any leftovers.
1. Mit der Füllung starten. Als Erstes die Stärke mit etwa der Hälfte des Wassers verrühren und dann zur Seite stellen. Die Beeren waschen und trocknen. Bei den Erdbeeren die grünen Blätter entfernen und die Beeren in kleine Würfel schneiden. Die Himbeeren und die Hälfte der Erdbeeren mit dem verbliebenen Wasser, Zucker, Zitronensaft und Vanille Extrakt in einen Topf geben. Die Mischung mit einem Stabmixer kurz pürieren, dann erhitzen und zum Kochen bringen. Die Beerensoße bei mittlerer Hitzezufuhr etwa 2-3 Minuten köcheln lassen. Als Nächstes die Stärkemischung dazugeben und unterrühren. Die Beerensoße sollte langsam andicken – für weitere 2 Minuten blubbern lassen, bis ein dicker Beerenpudding entstanden ist. Den Herd vom Topf ziehen und die Mischung kurz abkühlen lassen, dann die restlichen Erdbeeren dazugeben und untermengen. Ein Stück Klarsichtfolie direkt auf den Beerenpudding auflegen, damit sich keine Haut bildet, und den Pudding komplett abkühlen lassen. Man kann die Füllung schon gut einen Tag vorab vorbereiten.
2. Den Ofen auf 170°C (340°F) Ober-/Unterhitze vorheizen. Vier runde Silikon Backformen (20cm)* leicht einfetten und zur Seite stellen.
3. Die Eier für den Teig trennen – das Eiweiß mit einer Prise Salz in der Schüssel einer Küchenmaschine aufschlagen. Sobald das Eiweiß schaumig aussieht, die Hälfte des Zuckers (100g) langsam einrieseln lassen, während die Maschine die Masse weiter aufschlägt. Sobald der gesamte Zucker eingerührt ist, die Masse für weitere 2 Minuten auf höchster Stufe aufschlagen, bis sie schön dick und glänzend ist.
4. Die Eigelbe in einer großen Schüssel mit dem verbliebenen Zucker (100g) und dem Vanille Extrakt hell und luftig aufschlagen – dauert etwa 2-3 Minuten. Mehl, Backpulver und Salz vermischen, dann in mehreren Portionen in die Schüssel sieben und mit einem Gummispatel untermengen. Das aufgeschlagene Eiweiß dann ebenfalls in mehreren Portionen zur Schüssel dazugeben und unterheben. Die erste Portion kann man etwas kraftvoller unterrühren, um den Teig aufzulockern, der Rest sollte allerdings vorsichtiger untergehoben werden, um so viel Volumen wie möglich zu erhalten. Den Teig gleichmäßig auf die vorbereiteten Silikon Backformen aufteilen und die Kuchenschichten für etwa 20-23 Minuten im vorgeheizten Ofen backen. Nach etwa der Hälfte der Backzeit sollte man die Positionen der Backformen vielleicht tauschen, damit die Kuchen gleichmäßig backen. Die Kuchenschichten aus dem Ofen nehmen und umgedreht in den Formen auf ein Kuchengitter setzen. Sobald die Kuchen ein wenig abgekühlt sind, kann man die Formen vorsichtig entfernen.
5. Für die Mascarponecreme den Mascarpone mit Puderzucker und Vanille Extrakt in eine große Schüssel geben und verrühren. Die Sahne dazugeben und zunächst langsam, dann auf höchster Stufe aufschlagen, bis die Creme schön kompakt ist – das kann gerne mal 2-3 Minuten dauern. Die Creme in einen Spritzbeutel mit Sterntülle füllen und zur Seite legen.
6. Um den Kuchen zusammenzusetzen, eine erste Kuchenschicht auf eine Servierplatte setzen. Etwas Mascarponecreme z.B. mit einer Winkelpalette* auf dem Kuchen verstreichen, dann am Rand entlang etwas Creme aufspritzen, um eine Begrenzung für die Füllung zu kreieren. Eine gute Portion der Beerenfüllung auf die Kuchenschicht löffeln und bis an den Rand mit der Creme verstreichen, um eine gleichmäßige Schicht zu bekommen. Eine Kuchenschicht auflegen, leicht festdrücken und dann den ganzen Prozess mit Creme, Füllung und den restlichen Kuchenschichten wiederholen. Wenn die letzte Kuchenschicht aufgelegt ist, die komplette Torte mit Creme einstreichen. Die Torte muss nicht super sauber eingestrichen werden – die Ränder werden ohnehin mit Mandelblättchen dekoriert. Etwas Creme für die Dekoration der Torte zurückbehalten.
7. Die gerösteten Mandelblättchen an den Seiten der Torte andrücken. Das geht am einfachsten, wenn man eine Schüssel oder einen Teller unter die Torte stellt, um alles aufzufangen, was beim Andrücken herunterfällt. Die Torte dann noch nach Belieben mit verbliebener Mascarponecreme und frischen Früchten dekorieren. Den Kuchen bis zum Servieren im Kühlschrank aufbewahren.
Hinweise:
+ Ich verwende am liebsten Rama Cremefine (19 % Fett)* als Alternative für die Schlagsahne. Sie macht die Creme stabiler und gerinnt auch beim längeren Schlagen nicht. Eine Creme, die man damit zubereitet, ist auch etwas weißer als eine Creme mit normaler Schlagsahne.
+ Die Mandelblättchen kann man einfach in einer großen, beschichteten Pfanne ohne zugeben von Fett anrösten. Man sollte allerdings vorsichtig sein, da die Mandeln schnell zu dunkel werden.
+ Für die Dekoration der Torten braucht man nicht die komplette Menge an Mandelblättchen aus dem Rezept, aber mit etwas mehr davon ist das Dekorieren wesentlich einfacher. Reste kann man prima für andere Desserts verwenden. Gleiches gilt für die Beerenfüllung, sollte etwas übrig bleiben.
Craving more? Keep in touch on Facebook, Instagram and Pinterest for new post updates and more. You can also contact me with any questions or inquiries!
Here is a version of the recipe you can print easily.
Description
This delicious little cake is perfect for everyone who loves strawberries and raspberries. A great (not too sweet) treat for friends and family!
For the strawberry & raspberry filling:
1 cup (240ml) water
2.1 oz. (60g) cornstarch*
17.6 oz. (500g) fresh strawberries, diced
3.5 oz. (100g) fresh raspberries
3/4 cup (150g) sugar (fine)*
2 tbsp. lemon juice
1 tsp. vanilla extract*
For the cake batter:
8 medium eggs, divided
1 pinch of salt
1 cup (200g) sugar (fine)*, divided
1 tsp. vanilla extract*
8.1 oz. (230g) all-purpose flour*
1/2 tsp. baking powder
1/4 tsp. salt
For the mascarpone cream:
9 oz. (250g) mascarpone, cold
2 tbsp. confectioners’ sugar*
2 tsp. vanilla extract*
9 oz. (250g) heavy cream or alternative* (see note), cold https://amzn.to/4e9XqV3
For the decoration:
5.3 oz. (150g) sliced almonds, toasted
some fresh strawberries & raspberries (optional)
1. Start with the strawberry-raspberry filling. Mix the cornstarch with about half of the water and set aside. Wash and dry the strawberries and raspberries. Remove the green leaves from the raspberries and cut them into small dice. Add half of the diced strawberries and all the raspberries to a large saucepan, as well as the remaining water, sugar, lemon juice, and vanilla extract. Use an immersion blender and mix to get a smooth berry sauce. Next, heat up and bring that mixture to a boil. Let the mix simmer over medium heat for about 2-3 minutes. Next, add the cornstarch mixture and stir it in until the berry mixture starts to thicken. Let the mixture bubble for another 2 minutes so you get a pretty thick berry custard. Remove from the heat and let cool down for a moment, then add the remaining strawberries and mix in. Place a piece of plastic wrap right on top of the berry custard to prevent a skin from forming and let it cool down completely. You can do this step a day ahead of time.
2. Preheat the oven to 170°C (340°F). Grease four 20cm round silicone baking molds* lightly and set them aside.
3. Divide the eggs – add the egg whites with a pinch of salt to the bowl of a kitchen machine and whisk until slightly foamy. Slowly add half of the sugar (100g) while mixing constantly. Once the sugar is added completely, continue mixing on high for another 2 minutes or so until the mixture is thick and glossy.
4. In a separate bowl mix the egg yolks with the remaining sugar (100g) and vanilla extract until light and fluffy – takes about 2-3 minutes. Combine flour, baking powder, and salt. Sift it in several batches into the bowl and fold it in with a rubber spatula. Next, add the whisked egg whites in several batches as well and fold in carefully. It’s fine to mix a bit more vigorous at the beginning to loosen up the batter, but most of the whisked egg whites should be folded in carefully to keep as much volume as possible. Divide the batter evenly between the silicone molds and bake the cake layers for 20-23 minutes – switch the positions of the baking molds half way throught the baking time. Take the cake layers out of the oven, flip them in the silicone molds onto wire racks. Remove the molds carefully when everything has cooled down a bit.
5. For the mascarpone cream add the mascarpone, confectioners’ sugar, and vanilla extract to a large bowl and mix until well combined. Add the heavy cream and start mixing slowly, then increase the speed and mix everything until stiff peaks form – this can take 2-3 minutes. Fill the cream into a large piping bag with a star tip and set aside.
6. To assemble the cake place a cake layer on a serving plate. Pipe a small amount of the mascarpone cream on the cake layer and spread it evenly with an angled cake spatula*, for example. Next, pipe a border with the cream around the edges of the cake. Spoon a good amount of the strawberry-raspberry filling onto the cake and spread it evenly – you want an even layer with the cream border you piped before. Place a cake layer on top and press it down a bit. Repeat the process with cream, filling and the remaining cake layers. When you have added the last cake layer, coat the whole cake with mascarpone cream. You don’t have to work super clean – the cake will be covered with sliced almonds anyway. Keep enough cream to decorate the cake with little swirls.
7. Press the toasted sliced almonds onto the cake along the sides. This works best when you hold the cake over a bowl or plate to catch sliced almonds falling down. Decorate the cake with the remaining mascarpone cream and fresh fruit to your liking. Keep the cake in the fridge until ready to serve.
Notes
+ I prefer using Rama Cremefine (19% Fat)* which is an alternative for heavy cream. It’s more stable than heavy cream and does not split when whipped longer. The whipped cream you can make with that is also whiter than whipped cream made with heavy cream.
+ To get the toasted sliced almonds, simply add them to a large non-stick frying pan and toast them without anything added until lightly browned. Be careful not to burn them.
+ You will not need all the toasted sliced almonds to coat the cake, but having a bit more makes it easier to work with it. Leftovers can be used in other desserts. The same goes for the strawberry filling if you have any leftovers.
+ recipe adapted from The Scran Line
Links marked with an asterisk (*) are affiliate links (advertising/Werbung) to Amazon Germany. If you click on one of those links and buy something via this link, I will get a commission for that sale. The price of whatever you buy is not affected in any way by this.