

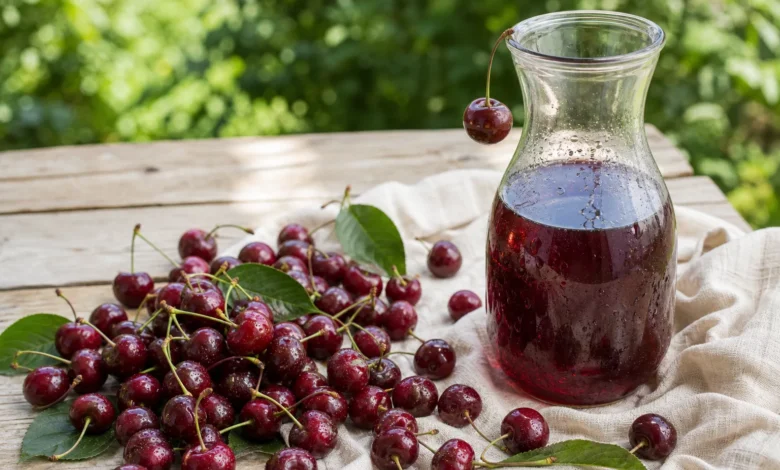
In midsummer, the branches are often full of ripe cherries – more than can be eaten fresh, and the blackbirds are already in the starting blocks. Before the fruit spoils on the tree, it is better to make juice from it. Making cherry juice yourself is surprisingly uncomplicated: around 1.5 kilograms of cherries make about two bottles of deep red juice, and you decide for yourself whether you use a pot or a juicer. In any case, an expensive special device is not a must. And you save yourself the tedious removal of stones with both methods.
Do you have to pit the cherries beforehand?
The short answer is: no. Neither the pot nor the juicer method requires you to remove the seeds beforehand. When cooked, the skin bursts open, the pulp becomes soft and releases its juice – the seeds remain whole. Then pour the cooked cherries through a sieve lined with a damp cloth. The cloth retains the seeds and fruit residue while the clear juice runs into the bowl. The same thing happens in the steam juicer: the hot steam releases the juice, seeds and peels collect in the upper basket.
This easily saves half an hour of dull manual work for one and a half kilos of cherries. You should only pluck the stems – and only after washing them, otherwise juice will come out of the open area.

Make your own cherry juice in a pot
For the classic version, all you need is a large pot, a fine-mesh sieve and a clean kitchen towel or strainer cloth. The quantities are quickly explained:
- 1.5 kg fresh cherries (sweet or sour cherries)
- Water for barely covering
- approx. 50 g sugar per kilo of cherriesto taste
- Yield: about 2 bottles of juice
- Rinse the cherries with cold water and only then remove the stems. Sort out any rotten or mushy fruit.
- Place the cherries in the pot and just cover with water – too much of it will dilute the juice unnecessarily.
- Cover and simmer over low heat for 10 to 15 minutes until the fruit bursts and is completely soft.
- Pour the mixture through a sieve lined with a damp cloth over a bowl and allow to drain for 40 to 50 minutes. For crystal clear juice, do not press; If you want more yield, gently squeeze the cloth at the end.
- Pour the collected juice back into the clean pot, add sugar to taste and bring to the boil again over medium heat.
- Immediately pour boiling hot into prepared bottles (more on filling below).

Prepare cherry juice in the juicer
If you process larger quantities or want to save yourself the trouble of straining by hand, you can use a steam juicer. The principle: Water boils in the bottom pot, the rising steam heats the cherries in the perforated upper basket and drives out the juice, which runs through a hose directly into the bottle.
Here too, wash the cherries first and sort out any rotten spots. You don’t have to gut anything. Fill the fruit into the basket, let the device work for around 45 to 60 minutes depending on the quantity and collect the juice. It is only sweetened at the end, according to taste. Nevertheless, this juice should also be boiled again before bottling so that it lasts a long time.

Which method suits you better depends primarily on the quantity and your kitchen equipment:
| criterion | Pot method | Steam juicer |
|---|---|---|
| equipment | Pot, sieve, cloth – there in every kitchen | special device required |
| Expense | Strain and drain by hand | largely runs itself |
| Time | around 60 minutes including draining | about 45 to 60 minutes of steaming |
| Ideal for | small to medium quantities | large harvests at once |
Sour cherries or sweet cherries – which is better?
Basically, excellent juice can be made from both types – the difference is in the taste. According to the Federal Center for Nutrition, sweet cherries are in season from June to August; the earliest varieties ripen from the end of May; Sour cherries follow in July and August. Both provide potassium, some vitamin C and red anthocyanins, secondary plant substances with antioxidant effects.
For the juice, this means: Sweet cherries produce a mild, naturally sweet juice that often does not contain any additional sugar. Sour cherries such as morello cherries taste much more tart and aromatic – their juice has more character, but can usually tolerate a little more sugar to round off the acidity. It’s best to taste the juice before bottling and sweeten in small steps. By the way, sour cherries are not a niche: in 2025, around 9,800 tons of sour cherries and around 37,300 tons of sweet cherries were harvested in Germany.

Preserving cherry juice: this is how long it stays good
To ensure that the juice doesn’t spoil after just a few days, it’s important to fill it cleanly and hot. Rinse bottles and caps in hot water beforehand or boil them briefly. Then fill the boiling hot juice up to just below the rim and close the bottle immediately – this leaves hardly any oxygen in the glass, which is exactly what will cause the juice to spoil. A guideline value of around 50 grams of sugar per kilo of cherries provides additional stability and rounds off the taste.
Stored in this way, sealed and in a dark and cool place – for example in the cellar or pantry – unopened cherry juice will last for several months. Once a bottle is opened, it belongs in the fridge and should be empty within one to two weeks.

What’s Hot

Cook and enjoy
Yellow spots on broccoli are harmless, black spots are not
Pro tips
- Work cleanly: Rinse bottles and lids with hot water or boil them – leftover old drinks are the most common cause of early mold.
- Fill to the brim: the less air in the glass, the longer the juice lasts; therefore close immediately after filling.
- Note the date: A small label with the bottling date tells you at a glance which bottle comes first.
- Avoid light: Heat and sun break down color and vitamins; a dark basement is the best storage place.
This is how cherry juice tastes best
Pure and well chilled, homemade cherry juice is a small summer highlight – often more intense than any store-bought one. Diluted with sparkling water, it becomes a refreshing spritzer that hardly anyone leaves behind; If you like, mix it like your own lemonade with mint and a squeeze of lemon. In cocktails, the juice gives aperitifs and spritz variants a deep red color, and its aroma is particularly effective as a base for desserts – red fruit jelly, sorbet or a pour over vanilla ice cream.
If it’s harvest time anyway, it’s worth taking a look at other classics: you can make your own apple cider just as easily in the fall, make your own elderflower syrup in early summer, or make your own applesauce from fallen apples.
Frequently asked questions
Can you freeze cherry juice instead of boiling it?
Yes. Pour the cooled juice into freezer bottles or bags, leaving about a fifth of space because liquid expands when frozen. It lasts for several months and can be defrosted in portions – practical if you only have small quantities or don’t want to cook bottles at all.
Why does the juice foam when boiling and become slightly cloudy?
When heated, proteins and pectins from the pulp rise to the surface as a light foam. This is completely harmless. For a clearer juice, simply skim off the foam with a spoon before bottling.