


A shaky hand or gaps in memory don’t exclude anyone from the craft table. Spring in particular provides grateful motifs: the first blossoms, colorful Easter eggs, little fairies. The following craft ideas for seniors are deliberately selected so that they can be achieved with prepared individual parts, few materials and manageable steps – from a project for a whole afternoon to an idea for in between. Each suggestion includes a list of materials and information about what is important in rounds with dementia. In just under an hour you can create something at the craft table that ends up on the windowsill or goes on as a small Easter gift.
Why spring crafts are good for seniors
Crafting is more than just a pastime. Cutting, folding and painting keeps fine motor skills and hand-eye coordination active, and concentrating on a piece organizes your thoughts for a while. Conversations start to happen in the group – about previous springs, your own garden or the Easter celebrations back then. Such memories connect and lift the mood.
There is another benefit in dementia. Spring motifs tie in with the season and provide orientation; the finished piece in your hand conveys a sense of achievement. According to the German Alzheimer’s Society, creative activities such as crafts or painting give people with dementia the feeling of being meaningfully occupied and can alleviate physical restlessness and depressive moods. What is important is not the perfect result, but the action itself.
As a quiet addition to a craft session, light exercise while sitting is suitable – such as sitting exercises for seniors, which can easily be incorporated into the same afternoon.
5 tips for crafting with dementia
With a few adjustments, almost every project can be achieved even in a group with dementia. These five points have proven themselves:
- Prepare individual parts: You take care of tricky work steps such as fine cutting in advance so that the focus at the table is on design.
- Few, clear steps: A project in three to four manageable stages doesn’t overwhelm anyone and still leaves room for your own ideas.
- A result that is impressive: A pretty, usable workpiece – decoration, gift, table decoration – is more motivating than just a simple exercise.
- Make the season noticeable: Real blossoms, the scent of spring flowers or natural materials awaken memories and give the afternoon a central theme.
- Demonstrate instead of describing: Show each move yourself – it’s easier to remember than a verbal explanation.
Spring fairies from the egg carton – the step-by-step idea
The little spring fairy is the most complex project in this collection and fills an entire afternoon of crafting. A figure with a dress, wings and a pigtail is created from a simple egg carton – a beautiful eye-catcher for the windowsill. If you prefer to use the cardboard in a different way, you will find additional ideas for crafting with egg carton.
What you need: an egg carton, acrylic or watercolors with a brush, scissors, craft glue, some wool for the hair, colorful paper for the wings and a small wooden disc as a base.

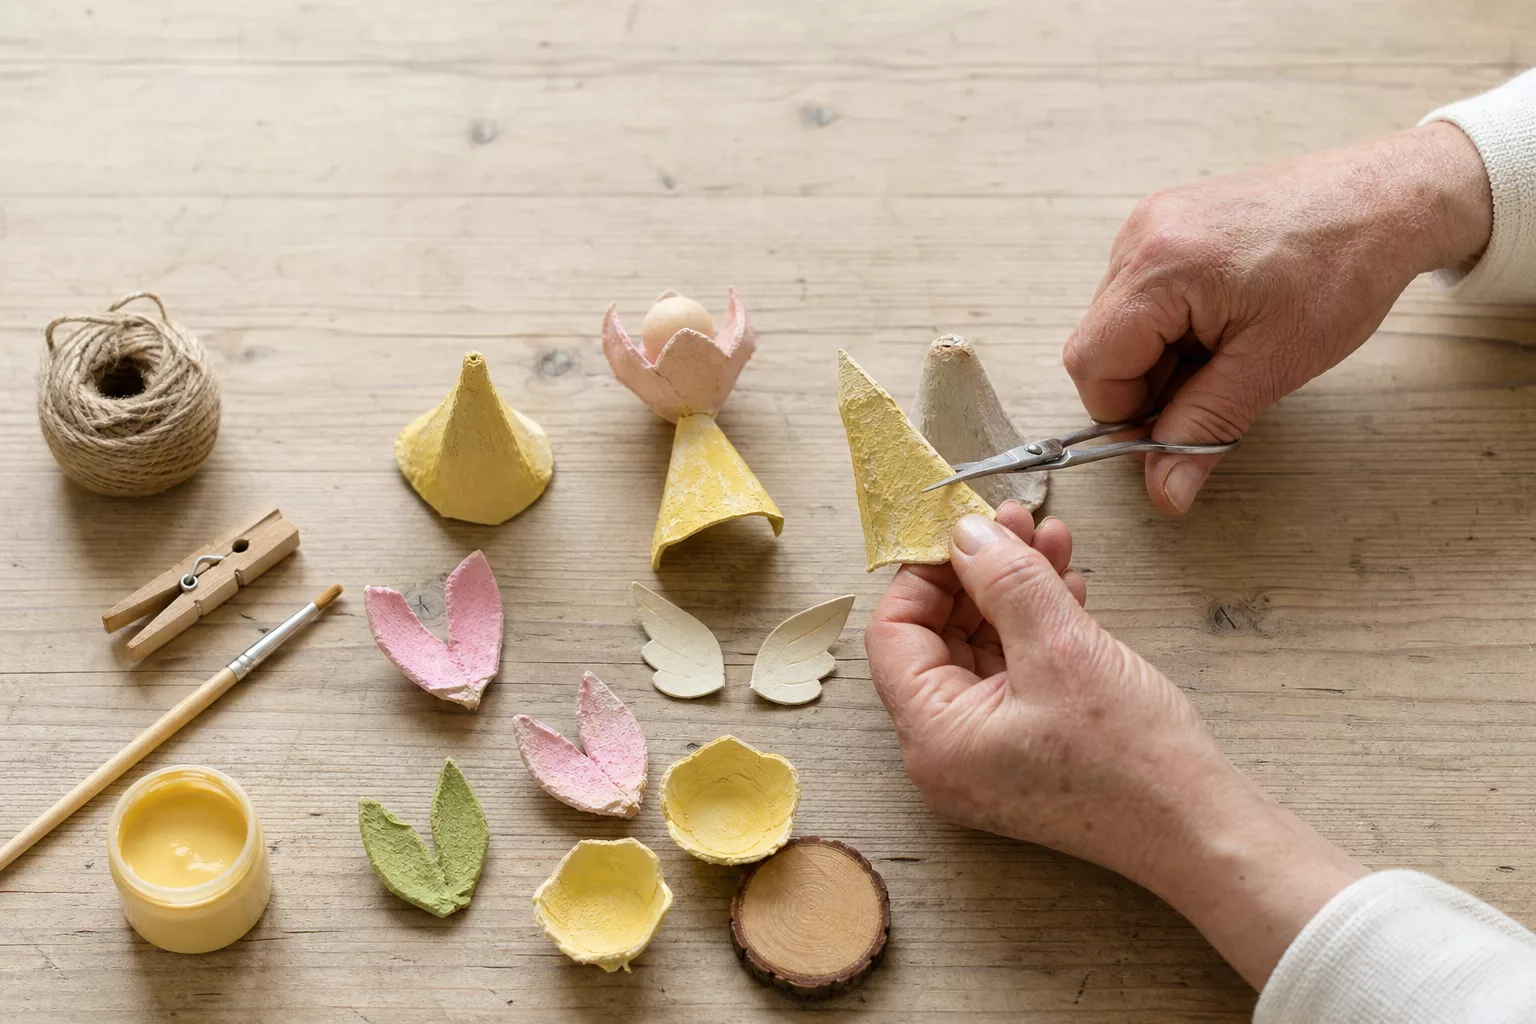
- Separate the individual bowls from the egg carton.
- Cut a bowl into a cone – this will be the body in the dress.
- Cut more bowls into petal shapes; they make up the skirt.
- Paint all parts in spring colors and allow to dry thoroughly.
- Glue the petals all around the cone to create a fanned skirt.
- Cut two small wings out of colorful paper and glue them on the back.
- Form a pointed hat out of a leftover pan or paper.
- Place a small wooden or paper ball as a head.
- Use a fine pencil to indicate a simple face.
- Braid a wool braid and attach it to the side.
- Put the hat on and glue it in place.
- Glue the fairy onto the wooden disc so that it stands securely.
- Finally, place small dots or a flower on the dress.
Two quick ideas for short craft rounds: flower pots and satin ribbon roses
Not every round lasts long. For days with a shorter attention span, two small projects that quickly lead to results are suitable.
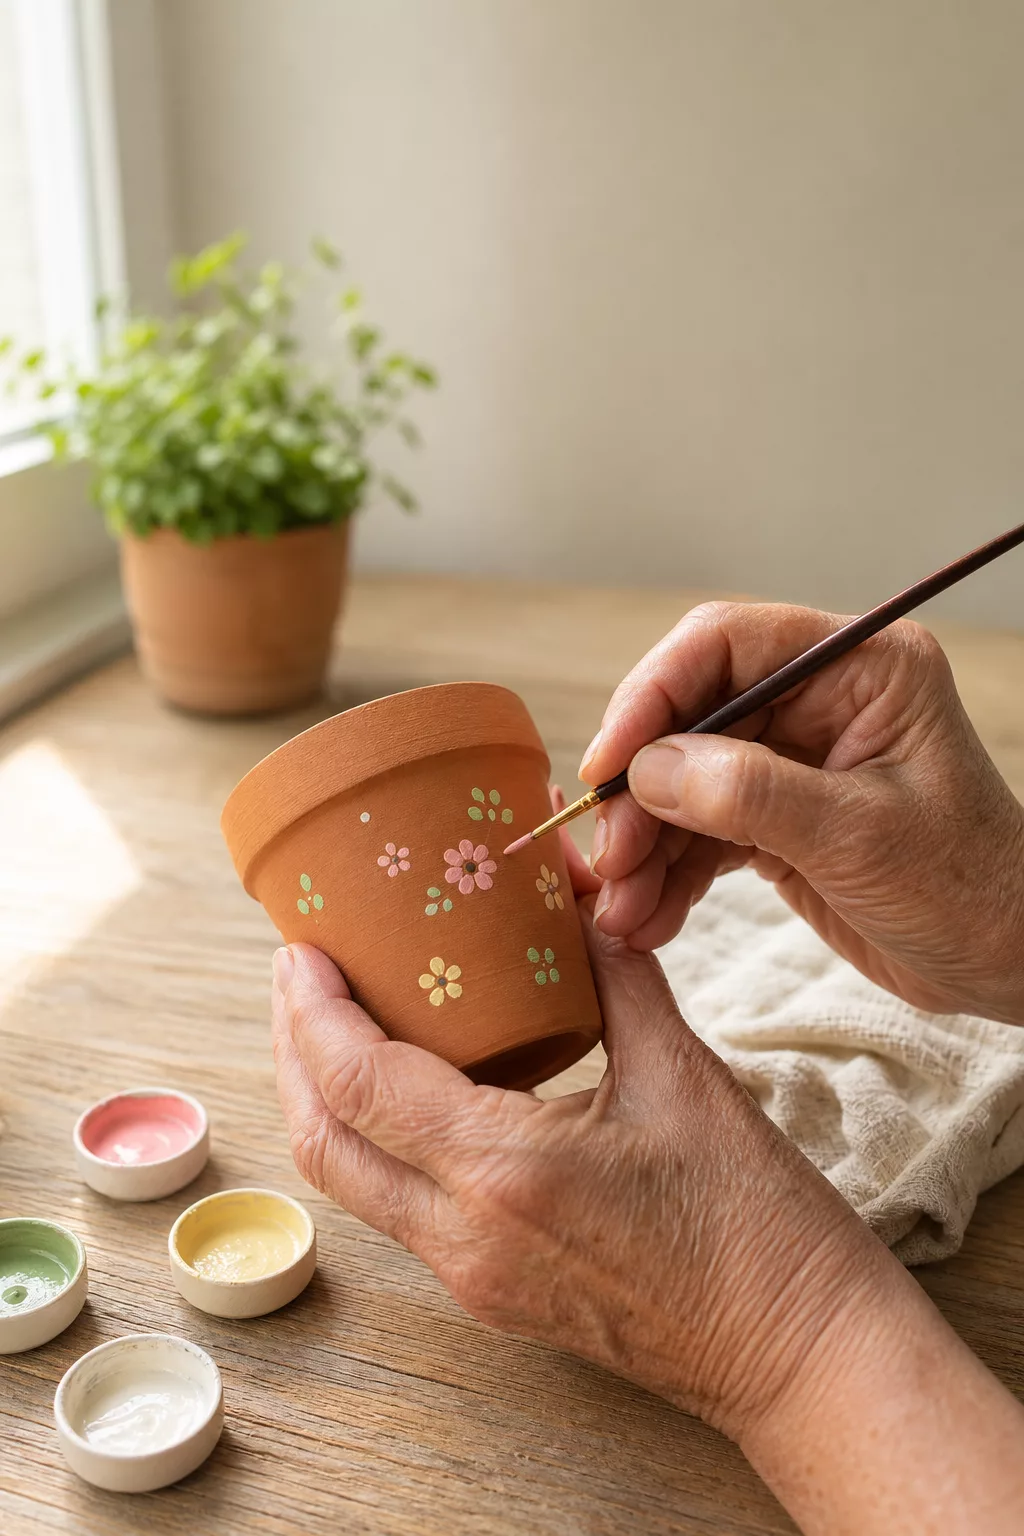
Painting terracotta pots: Small, unglazed flower pots only need acrylic paint and a fine brush. Dab dots, simple flowers or rings in pastel tones – this can be done even without a steady hand and looks particularly pretty with a planted primrose.

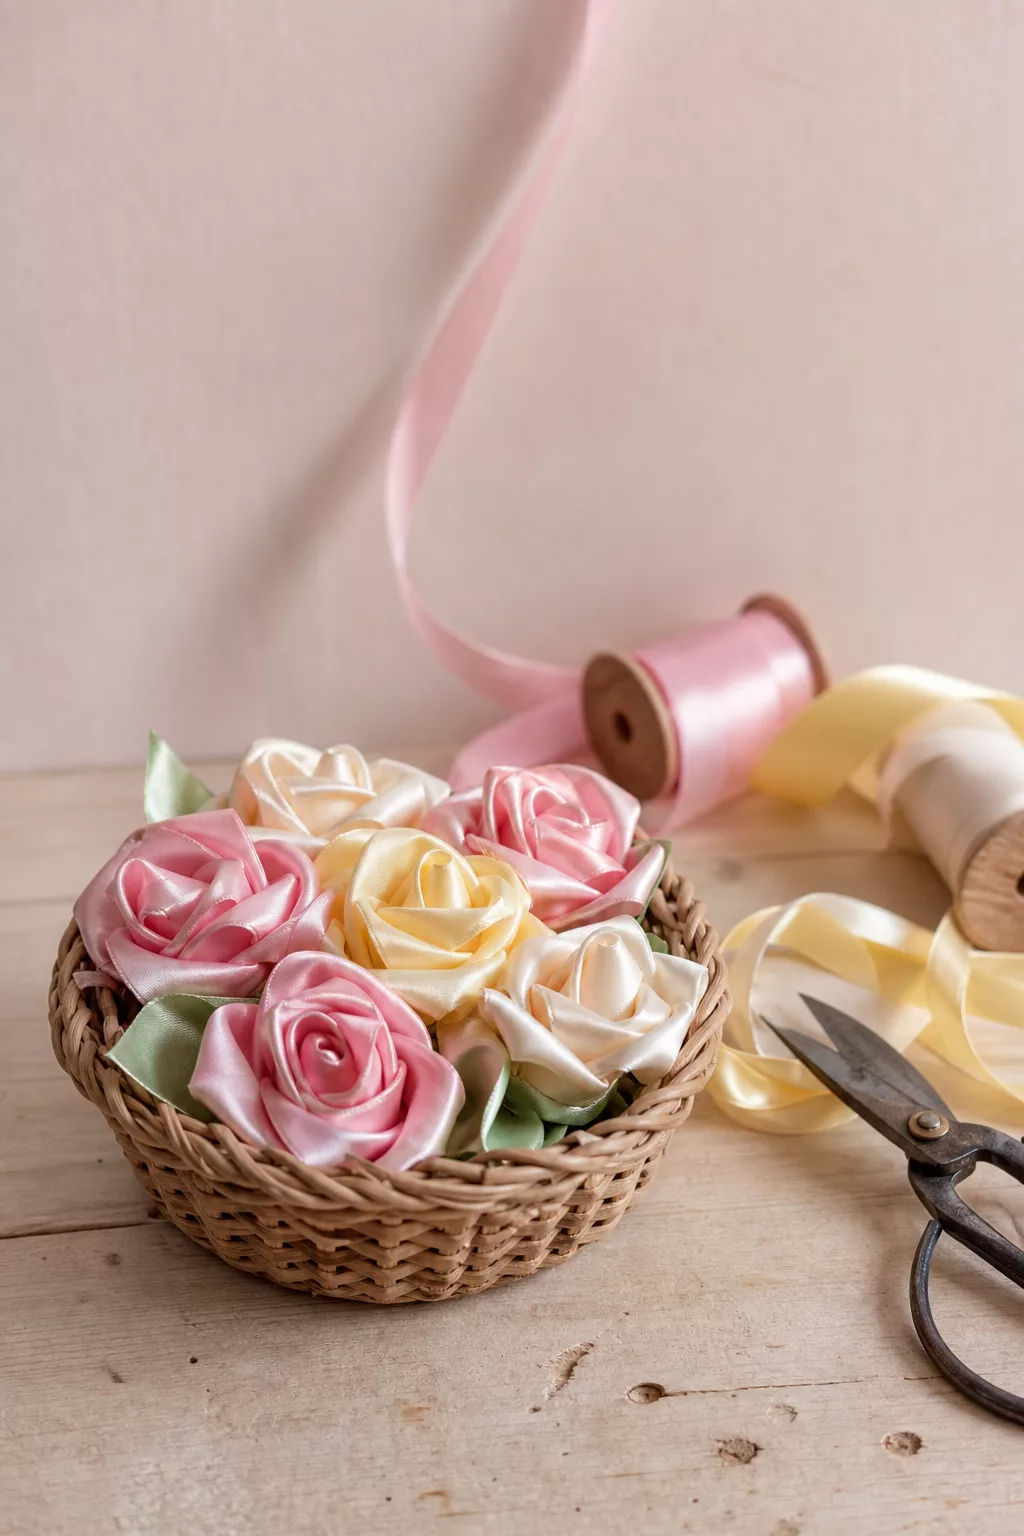
Satin ribbon roses: These flowers require a little more patience, but the result looks elegant. This is how it works:
- Prepare a satin ribbon about 50 centimeters long (around 2 cm wide).
- Roll one end into a small snail – this is the middle of the rose – and secure with a few stitches.
- Fold the band diagonally backwards and twist it once around the middle.
- Alternate folding and wrapping; With every fold a new petal grows.
- Continue until the rose is the desired size.
- Sew or glue the end of the ribbon under the flower and cut off the excess.
If you prefer a softer, cottony look, you can also make the flowers as roses from cotton pads.
Make a spring wreath out of toilet roll and egg carton
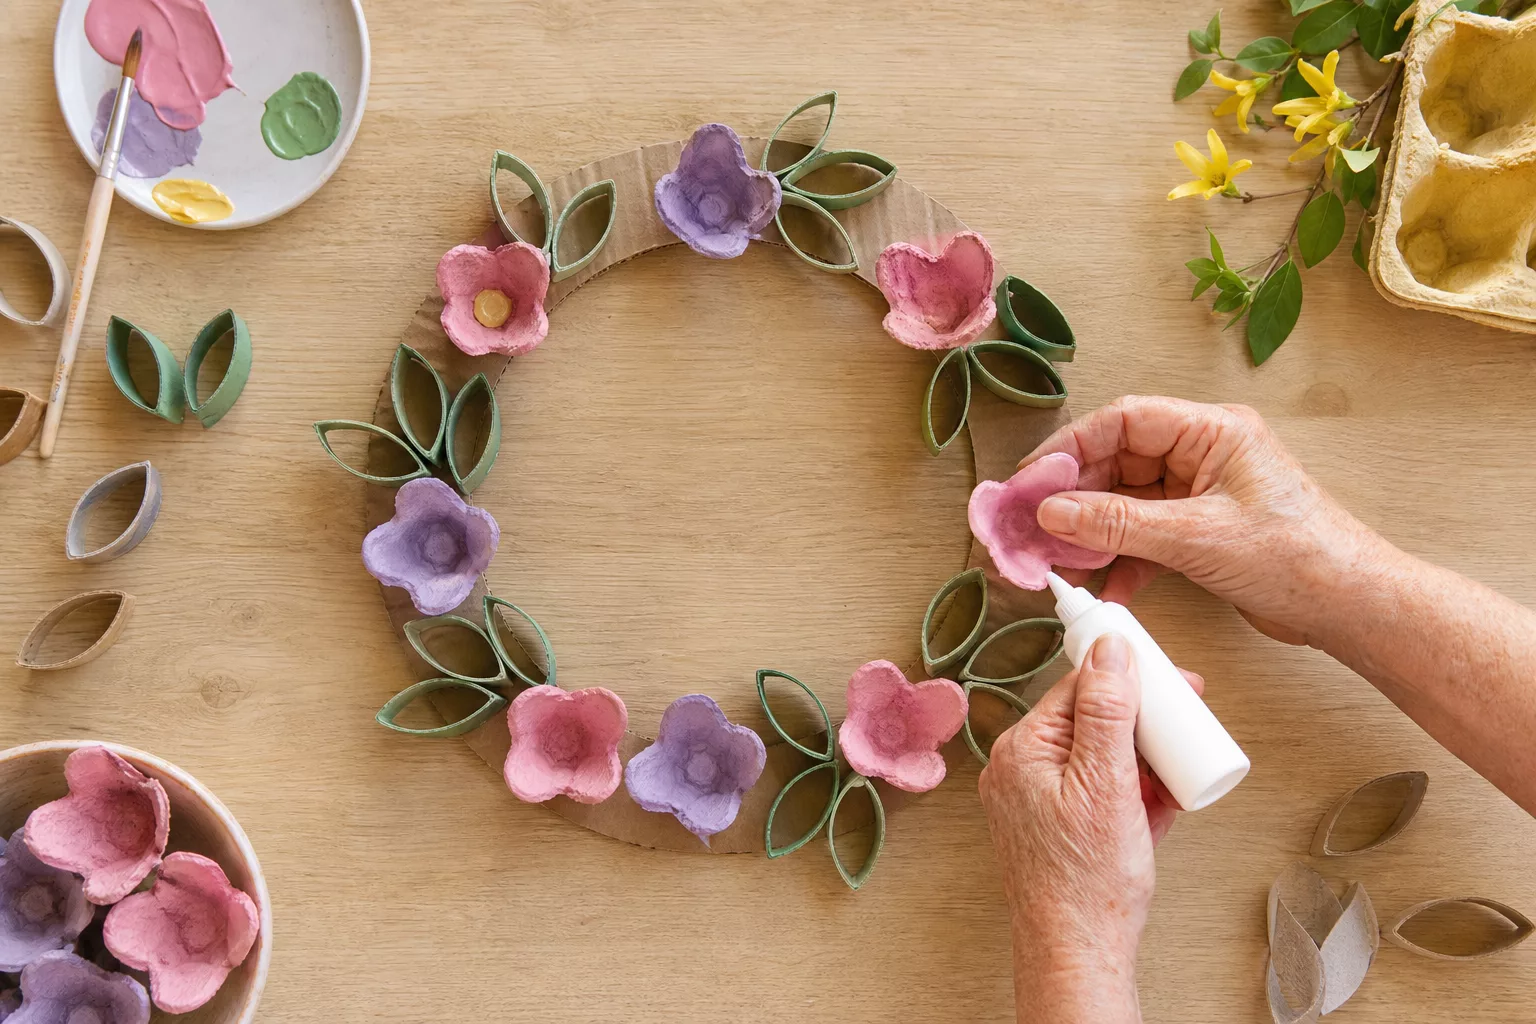
Four materials are sufficient for a spring-like door wreath: a cardboard ring as a base, empty toilet rolls, an egg carton as well as paint and glue. It’s ready in three steps.
- Flatten the toilet rolls and cut them into rings about two centimeters wide – they become sheets. The flowers are created from the egg carton bowls.
- Paint everything in green and spring tones and let it dry.
- Glue leaves and flowers onto the cardboard ring in an overlapping manner until it is densely covered all around.
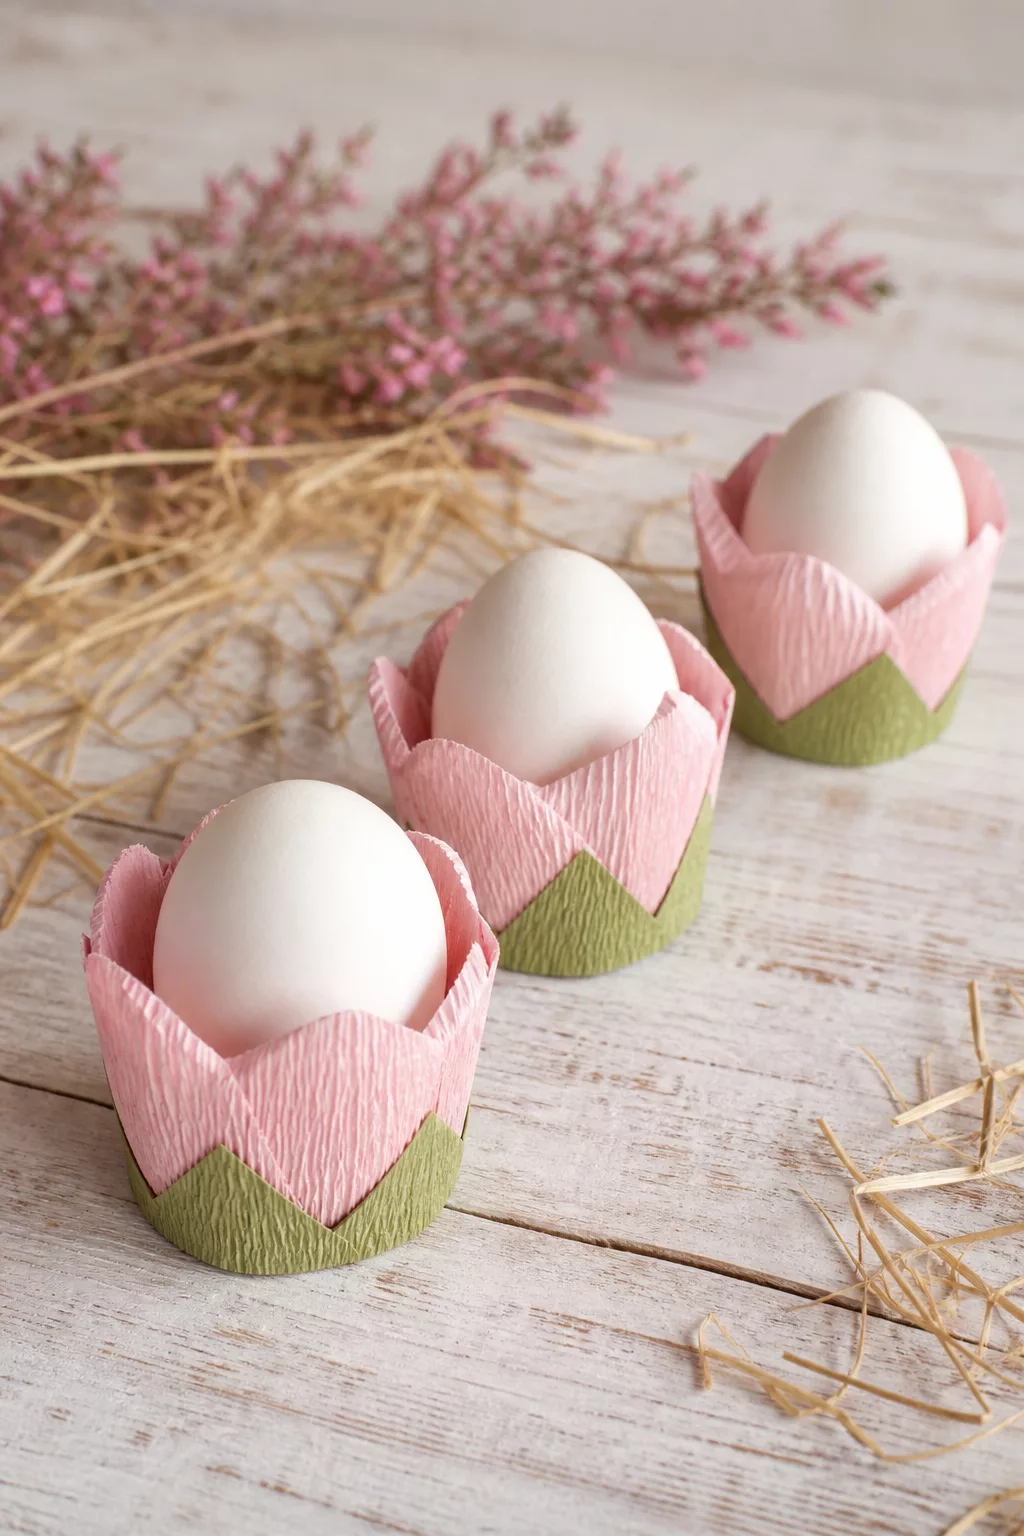
Crepe paper flower egg cups for Easter
These egg cups will transform the Easter breakfast table and can be made in fifteen minutes. It’s worth remembering the dimensions so that the flower sits evenly.
- Cut a ring about 2.5 centimeters high from a cardboard roll.
- Cut four strips out of crepe paper, about five centimeters wide and one centimeter longer than the circumference of the ring – one green and three in flower colors.
- Glue the green strip around the bottom of the ring and cut into points at the top; these are the leaves.
- Place the three colored stripes on top as petals and glue them in place.
- Place a blown or boiled egg in it and you’re done.
What’s Hot

Craft ideas for children
Making Mother’s Day cards with children: ideas by age
Bunny garland and Easter tree – two quick Easter gifts
If you still have time or energy left for something very simple at the end of the round, these two decoration ideas can be finished in just a few minutes – and are ideal as gifts.
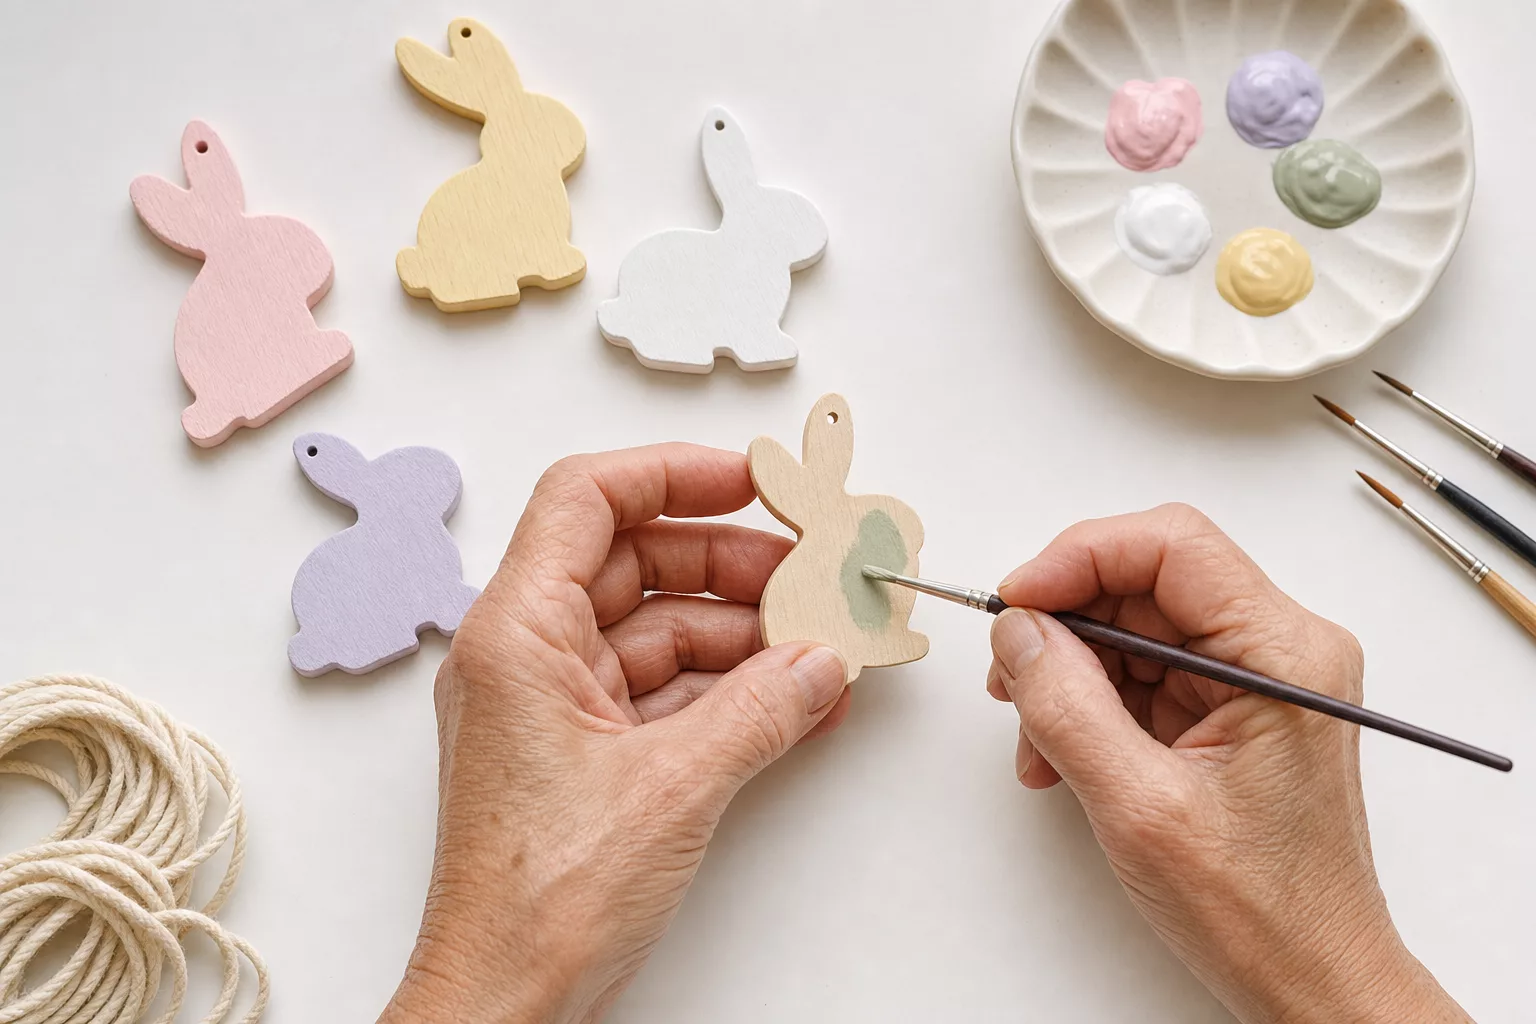
Bunny garland: Pre-cut wood or cardboard phases from the craft store save you the hassle of sawing out. Paint the bunnies in pastel colors, let them dry and thread them onto a cord. When lined up, they create a cheerful garland; You can use the same principle to tie other DIY garlands for any occasion.
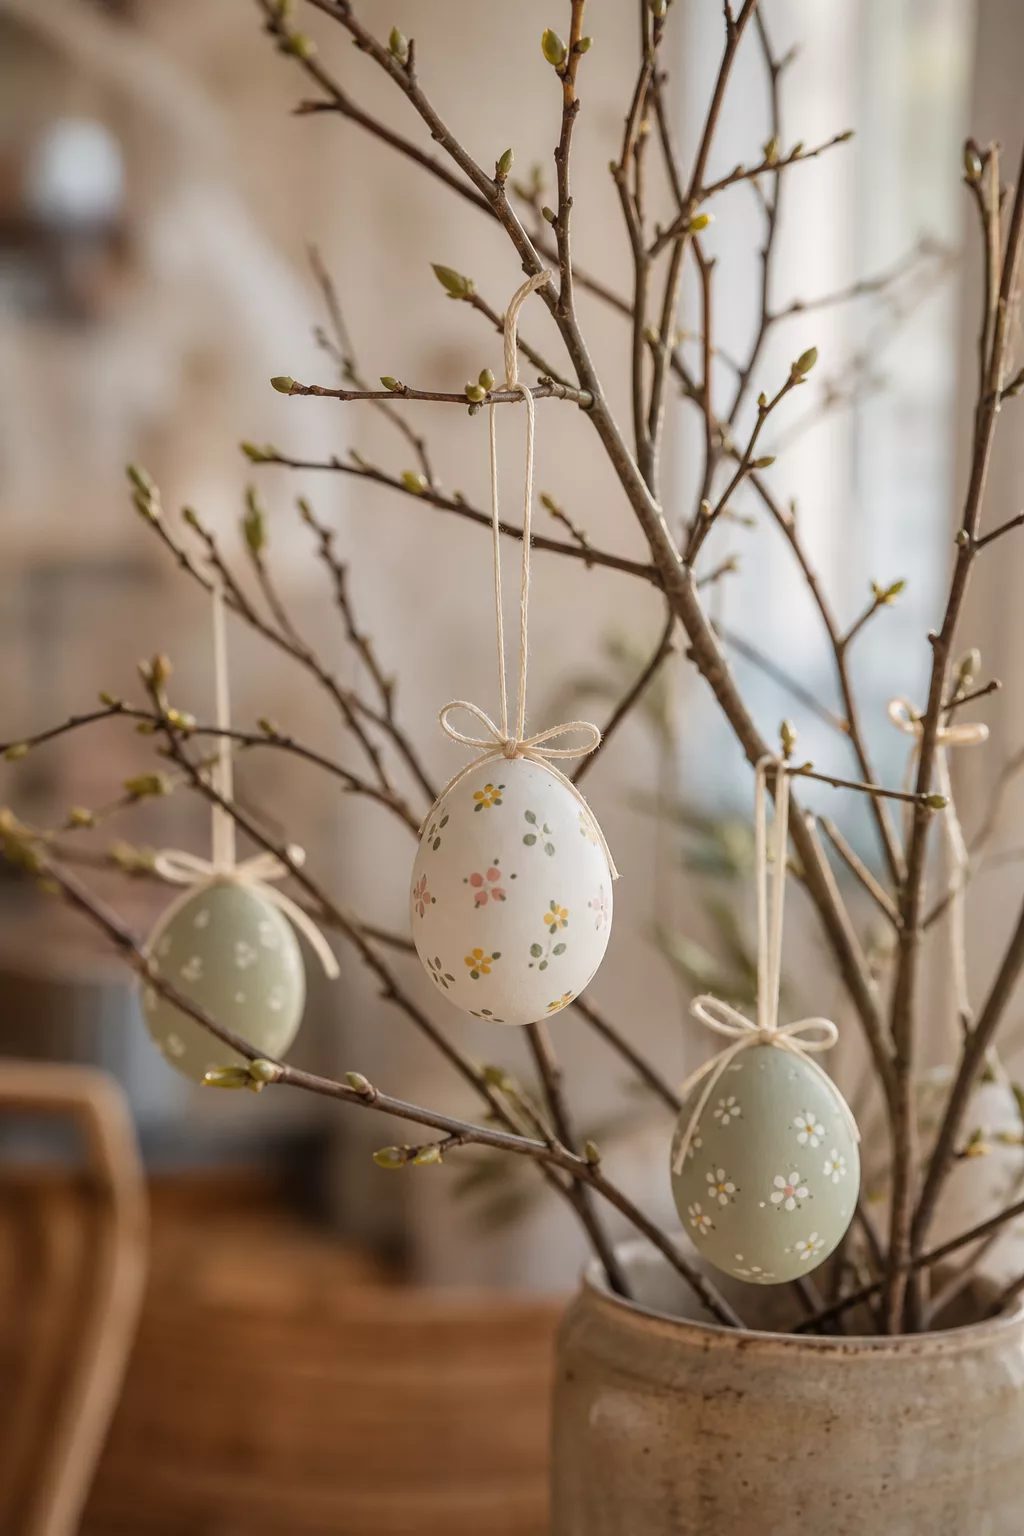
Easter tree: Place a few budding branches in a vase, hang blown-out or artificial eggs with fine ribbons – and you’ve got a small Easter tree. If you like, you can paint the eggs with dots or flowers beforehand.
What’s Hot
Craft ideas for children
Crafting with 2-year-olds in the summer: safe ideas for the crèche
Overview of craft ideas for seniors
Which project is suitable for a round depends primarily on the time available and the skill level. The table helps with the selection:
| project | Time expenditure | difficulty | For dementia groups |
|---|---|---|---|
| Egg carton fairy | 45-60 mins | medium | with prepared parts |
| Terracotta pots | 15-20 mins | light | very suitable |
| Satin ribbon roses | 20-30 mins | demanding | conditionally suitable |
| Spring wreath | approx. 30 minutes | light to medium | well suited |
| Flower egg cups | 15 mins | light | very suitable |
| Bunny garland & Easter tree | 10-15 mins | very easy | very suitable |
Frequently asked questions
How long should a craft session with seniors last?
30 to 45 minutes have proven to be a good guideline. In advanced dementia, shorter sessions with a break often make more sense – it’s better to have two 20-minute sessions than one long session in which concentration drops.
Which aids make crafting easier if you have limited fine motor skills?
Spring-loaded or bench scissors with thick handles cut with little force, a non-slip base keeps the workpiece in place, and thicker brushes fit better in the hand. Pre-cut individual parts take the most difficult step away completely.
How many people should be in a craft group?
Three to four participants per supervisor is a good guideline. This leaves enough time to help everyone if necessary without the round coming to a standstill.